Einkorn Bread with Overnight Sponge

Try this Simple Einkorn Bread with Overnight Sponge

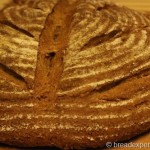
This Einkorn Bread with Sponge is a simple recipe for making a soft and flavorful loaf using an overnight sponge instead of sourdough.
Einkorn Bread with Overnight Sponge

I’ve been experimenting with Einkorn flour and decided to try a simple whole wheat bread recipe using freshly milled Einkorn and an overnight sponge. This versatile recipe can also be made with regular whole wheat or spelt flour if that’s your preference, offering slightly different flavors and textures.

Einkorn, the first wheat cultivated by humans over 12,000 years ago, is enjoying a resurgence thanks to its high protein content and ability to thrive in challenging growing conditions. Its creamy color and light, rich flavor make it a joy to bake with, and I’ve enjoyed exploring its unique qualities in my bread recipes.
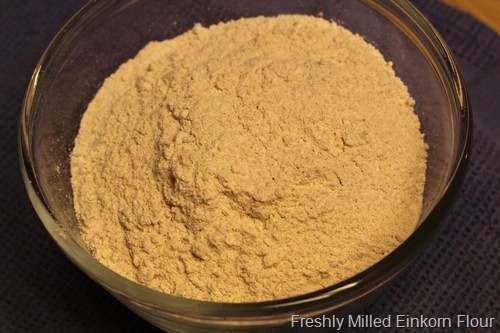
Freshly Milled Einkorn Flour

Notes:

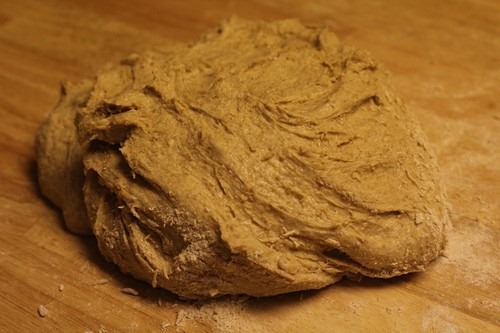
Kneading Time: Kneading einkorn dough is different from other types of dough due to its lower gluten strength. In my experience, it takes about 5–7 minutes of gentle kneading on a floured surface after the autolyse stage to achieve a soft and supple dough. Einkorn dough will always remain a bit sticky, so don’t worry if it doesn’t fully pull away from your hands or the surface—it’s more about the texture and feel. If your dough scraper worked well, you’ve likely developed the dough enough!

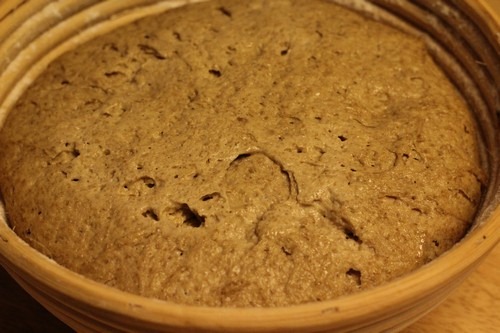
Final Proofing Time: The final proof can vary depending on the temperature and humidity of your kitchen. For this recipe, the dough is ready when it passes the “poke test.” Gently press the dough with a wet or floured finger. If the dough springs back slowly and feels soft and full of gas, it’s ready to bake. Keep an eye on it, as over-proofing can lead to a flatter loaf. Typically, this takes about 30 minutes to an hour at room temperature, but keep an eye on the dough rather than the clock.

General Tip: Since einkorn behaves differently from modern wheat, handling it more gently often yields better results. The rest periods (like the autolyse) help the dough come together without overworking it.
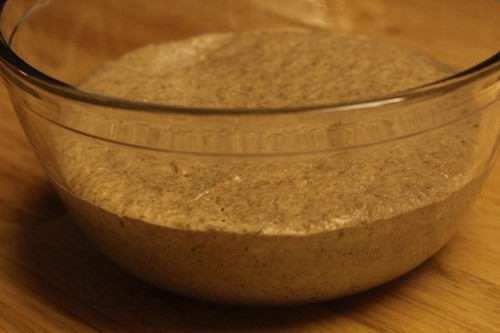
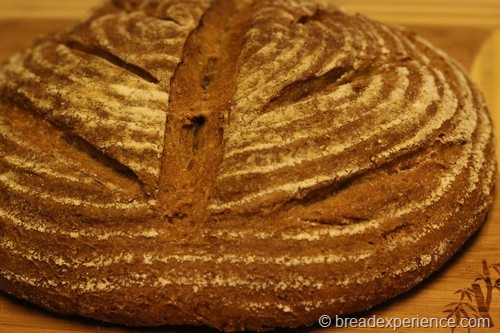
This Einkorn loaf has a distinct nutty flavor that sets it apart from regular whole wheat. While the recipe doesn’t include sweeteners, adding honey could complement the flavor nicely. Even without it, I find the taste delightful and unique.
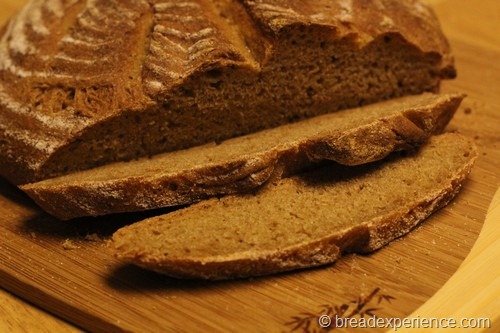
Einkorn Bread with Overnight Sponge Sliced

Recipe is adapted from Bread Science by Emily Buehler

Print
clock clock iconcutlery cutlery iconflag flag iconfolder folder iconinstagram instagram iconpinterest pinterest iconfacebook facebook iconprint print iconsquares squares iconheart heart iconheart solid heart solid icon
Einkorn Bread with Overnight Sponge

Einkorn Bread with Overnight Sponge


5 Stars 4 Stars 3 Stars 2 Stars 1 Star

No reviews

  • Author: Bread Experience
  • Yield: 1 Loaf 1x

Description

Learn to bake Einkorn Bread with an Overnight Sponge! This simple recipe offers tips for kneading, proofing, and baking a soft, flavorful loaf.


Ingredients

Units Scale

Sponge:

  • 187 g (1 2/3 cups) Einkorn flour
  • 140 g (2/3 cup) water (50 to 55 degrees F.)
  • 1/8 tsp instant yeast

Final Dough:

  • 210 g (~1 3/4 cups) Einkorn flour (plus more for kneading)
  • 327 g Sponge (all of it)
  • 140 g (2/3 cup) water (60 to 65 degrees F.)
  • 1/2 tsp instant yeast
  • 2 tsp salt (~8 grams/2%) or less if desired

Instructions

Prepare the Sponge:

Mix the sponge ingredients 12 to 15 hours before you plan to make the dough. If the temperature is cooler in the house, use warmer water; if it is warmer in the house, use cooler water. The final temperature should be about 65 degrees F.

Cover the sponge and let it rest at room temperature for 12 to 15 hours. The sponge is ready when it appears bubbly and slightly risen.

Mix the Dough:

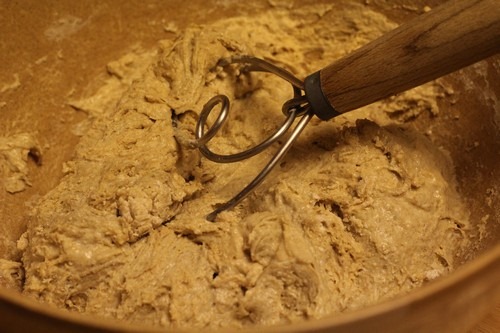
Combine all of the dough ingredients, including the sponge, in a large mixing bowl until a dough forms. Using a Danish dough whisk, wooden spoon, or dough scraper works well for this step.

Knead the Dough:

Turn the dough out onto a lightly floured surface and knead for about 5–7 minutes, or until it comes together and feels soft and supple. Einkorn dough has a more fragile gluten structure, so it doesn’t require extensive kneading.

If the dough feels too sticky, let it rest (autolyse) on the counter for about 10–15 minutes before kneading to help the gluten develop.

First Rise:

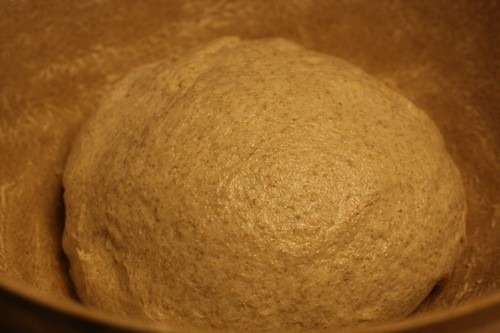
Place the dough in a bowl and cover it with a kitchen towel. Let it rise at room temperature until doubled in bulk, about 1 hour.

Second Rise:

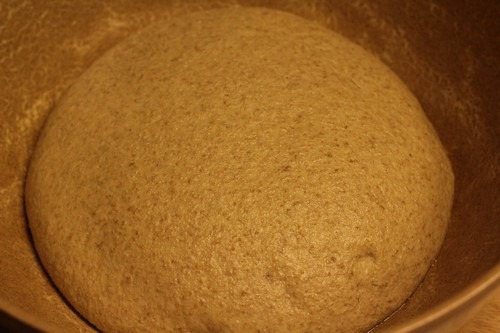
Punch down the dough, fold it, and let it rise again, covered until doubled in bulk again, about 1 hour.

Shape the Loaf:

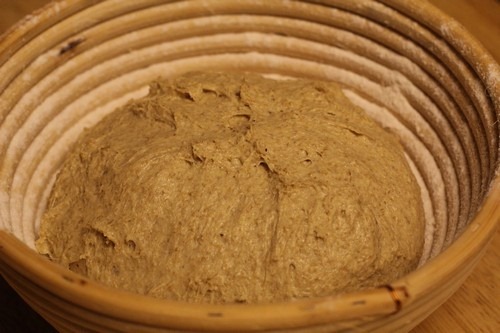
When the dough is fully risen shape it into a boule (ball) and place it smooth-side-down in a floured banneton basket or a bowl lined with a towel heavily dusted with flour. Ensure the container supports the loaf but allows for expansion. Cover with a towel to prevent the dough from drying out.

Final Proof:

Let the loaf proof until it is soft and full of gas, typically 30 minutes to 1.5 hours depending on room temperature. To check if it’s ready, gently poke the dough with a wet or floured finger. If the dough slowly springs back and feels soft and full of gas, it’s ready to bake. Keep an eye on it, as over-proofing can lead to a flatter loaf.

Prepare the Oven:

Preheat the oven to 500 degrees F. (for about an hour) with a pizza stone on the middle rack and a steam pan underneath.

Bake the Loaf:

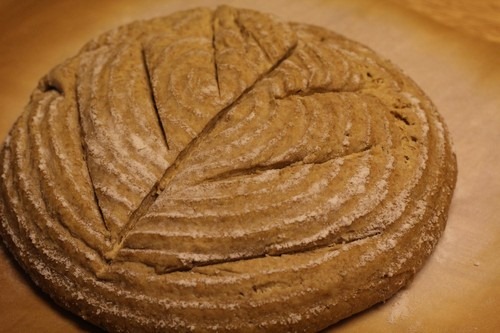
Carefully flip the loaf onto parchment paper and score it. If it sticks to the basket, gently coax it out.

Slide the loaf (on the parchment paper) onto the hot baking stone. Add 1 cup of hot water to the steam pan.

Immediately lower the oven temperature to 450 degrees F. Bake for 20–25 minutes, or until the loaf is browned and makes a hollow sound when thumped on the bottom. Remove the parchment paper partway through baking to ensure the bottom gets baked through.

Cool and Serve:

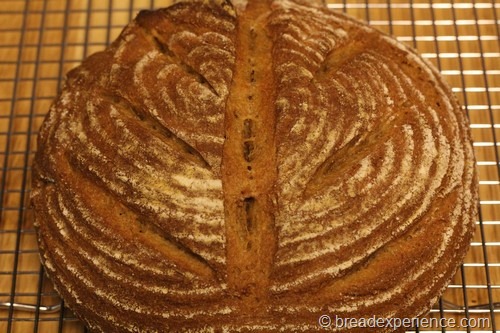
Cool the loaf completely on a wire rack before slicing.

Notes

  • Proofing and Kneading Variability: Times for kneading and proofing can vary based on factors like room temperature, humidity, and the specific qualities of your einkorn flour. Use visual and tactile cues (like the poke test) to guide you for the best results.
  • Handling Sticky Dough: Einkorn dough tends to be stickier than other flours. Don’t be tempted to over-knead or add too much flour; instead, use resting periods and gentle handling to develop the gluten.
  • Category: Artisan Einkorn Bread
  • Method: sponge


Happy Baking!  See you in the kitchen!
Cathy

Comments

22 responses to “Try this Simple Einkorn Bread with Overnight Sponge”

  1. villarosa

    Thank you, thank you, for working with einkhorn and sharing your recipe!!! I’ve been baking with einkhorn for about a year and have just used my own sourdough starter, so far with good success. BUT this recipe looks awesome. Am trying it today!

  2. Cathy (breadexperience)

    Hello Villarosa, thanks for visiting my blog. It’s nice to meet another Einkorn bread baker. Let me know how your bread turns out. I’m experimenting with a different method right now and will post the results soon.

  3. A beautiful loaf indeed! I am sure I will like it too!

  4. Just baked my first loaf using Einkorn flour. Great bread. Looking for additional recipes. Will try yours with the sponge. Thanks!

    1. I love working with Einkorn. Happy Baking!

  5. Cathy I’m so happy to have found you I have celiac disease and have missed good sourdough bread for 15 years I found einkorn about a year ago and have been playing with it i can eat it with no problems its wonderfull i love this flour I have problems with it thou I could use your help I have a year old rice flour starter and a potatoe starter I haven’t baked with regular flour in years and have forgotten the kneading techniques my problem is with stickyness and a wet texture help!and how long about do you kneed ? Thank you so much cathy Christine

    1. Hi Christine, I’m glad you can tolerate Einkorn. Einkorn is weaker than regular bread flour but it is extensible and very absorbent. For this particular bread, it helped to let the dough rest about 10-15 minutes before kneading and then I just had to feel the dough. It was still a bit tacky. If you find that you’re having to add too much flour during the kneading, you might want to just let it ferment longer in the bowl to develop the gluten.

  6. Rhonda Jones

    I am completely new to making bread. What if you don’t have a pizza stone?

    1. Hi Rhonda, you can bake this loaf on a baking sheet. It just won’t be as crusty on the outside.

  7. Sybil Garrison

    Hi Cathy,
    I made your bread yesterday. I used the One Degree Organic sprouted spelt flour in place of the einkorn and am happy to report great success!
    I used 2 tsp of salt which totaled 6 grams, but I thought the bread tasted a little too salty, so I will reduce it to 4.5 to 5 grams next time. I did add 1 tbsp of honey to the final dough, not the sponge.
    The dough was sticky as you wrote. To avoid adding too much flour, I oiled my hands with organic olive oil. I read about that trick somewhere.
    The end result was an airy, chewy, thinly crusted marvel of a loaf. I was so proud. I will be doubling the recipe and making it again this week.
    I am unlikely to ever make bread again without either pate fermentee or a sponge as it makes a huge difference in the quality of the bread.
    I love your blog! Thanks for the great recipes!

    1. Hi Sybil, thanks for sharing your experience making this bread with sprouted spelt. Oiling your hands and the work surface works well if you don’t mind incorporating a little more oil in the bread. I’m so glad your experiment turned out for you. I really like using perferments myself; however, with sprouted flour, supposedly it isn’t really necessary because the sprouting process takes care of that. However, I tend to use them anyway.

      Is it just this recipe that you found to be too salty? Or, do you think that you need less salt when using sprouted flour? The ratio of salt is 2% which is about right, but that’s with regular flour, not sprouted flour. Just curious what your thoughts are on this. I would think that 4 grams would be good especially for 1 loaf.

      1. Sybil Garrison

        I have made the mini baguettes with khorasan flour multiple times and the 7.5 grams of salt work well for that recipe.
        But when I made the Kamut Pain de Mie with the sprouted khorasan flour (all my flours are the One Degree Organic), we did find it too salty. Also, it didn’t rise as well, I think I needed to add more milk. I will try it again.
        I made spelt bread last year, without a sponge (different recipe) when I was completely new at it, and the loaf was good, but very dense (more the texture of rye bread of my youth), so I much prefer the sponge method.
        I will try the 4 grams next. I am preparing the sponge for a double batch today. I’ll let you know.

  8. This is now my third time making this bread and it is wonderful (I actually made in a loaf pan this time to use for sandwiches). I added 1/2 teaspoon each of salt and sugar to recipe this go around – yum, again.

    Thanks so much for a great recipe.

    1. Thank you for sharing your experience with this loaf. I’m glad you’re able to customize it to your liking.

  9. Roughly how long did your final proof take? And how long roughly do you knead initially? Until it forms a ball? I used dough scraper to “knead” it in a large bowl and that worked well. I just hope I did it long enough!

    1. Thank you for your question! It’s been a while since I made this specific recipe, but I’ll try to guide you based on my notes and general experience with einkorn bread.

      Kneading Time:
      Einkorn dough behaves a bit differently than regular wheat dough, as the gluten structure is more fragile and doesn’t require extensive kneading. I usually knead just until the dough comes together and feels soft and supple, which can take about 5–7 minutes. If you used a dough scraper to knead in the bowl, that sounds like a great technique! It’s less messy and works well for einkorn’s sticky texture. Resting the dough for about 10–15 minutes before kneading, as mentioned in the recipe, can also help develop the gluten without overworking it.

      Final Proof Time:
      The final proofing time can vary depending on your room temperature and how active your dough is. Typically, it should take about 30 minutes to 1 hour, but the best way to gauge readiness is the poke test. Gently press the dough with a wet (or floured) finger. If the dough slowly springs back, and feels soft and full of gas, it’s ready to bake. Keep an eye on it, as over-proofing can lead to a flatter loaf.

      Baking with einkorn can take a little practice, but it’s so rewarding. I’d love to hear how your loaf turned out!

      Note: I have updated the recipe and instructions for more clarity.

  10. Thanks for leaving this recipe up all these years. I found it today and I’m looking forward to trying it as I don’t have the patience to raise pet sourdough starter for more than a week —!! and was looking specifically for a sponge recipe 🙂 Thanks for helping out an impatient baker!

    1. Happy Baking! I hope you enjoy this bread.

  11. Second attempt, I made the first one as a sandwich loaf in a bread pan. Came out pretty good. Some tweeks I did. Added 2 tblsp of honey and 1 teaspoon of butter to my starter. (1 cup of eincorn) 1 1/2 cups of Eincorn flour and 1 1/2 cup of bread flour and the salt. I mixed some of the water with the starter,yeast,butter and honey and let this sit for half an hour before mixing with the dough ingredients. The first loaf proofed up good and rose more than I anticipated but made some awesome sandwiches. This one I’m going to try a round loaf proofed in a baton and baked on a pizza stone. I don’t have any parchment paper. Will baking on a hot stone over bake the bottom?

    1. Hi, I love that you’re experimenting with the recipe and making it your own with the honey, butter, and flour blend.

      Baking a boule directly on a hot stone can overbake the bottom, and parchment often helps a bit, but managing stone placement, oven temp, and total time on the stone matters more than the parchment alone.

      Here are some ways to avoid over browning the bottom:

      Generously dust the bottom of your loaf and peel (if using) with cornmeal to create a protective layer.
      Lower the temperature by 15–25°F and/or move the stone up one rack if your oven runs hot from below.
      Preheat the stone thoroughly, but shorten the time the loaf spends directly on it by finishing the last 5–10 minutes on a higher rack or on a bare oven rack. Or move it to a baking sheet.
      Another option is to add a heat diffuser (empty baking sheet or second stone) on the rack below to soften the heat hitting the primary stone.

      Good luck with the round loaf—your modifications sound delicious!

      Happy Baking!
      Cathy

  12. Michelle R

    I want to echo one of the comments thanking you for leaving the recipe up all of these years! I have been using einkorn for a while now, but I’ve never used a sponge method.

    I have a question… My dough came out very, very, very sticky and never seemed to lose its tack. It rose and acted like it was ready for each of the steps, by I always had to use a scraper and I think I washed a fifth of the dough off my hands and utensils! Lol

    I’m on the final proof and plan on moving through with the bake!

    Any idea of what I could’ve done wrong? I’ll update you after she’s done!

    1. This is a tacky dough. Not sure what type/brand of Einkorn you’ve been experimenting with, but something else to keep in mind is different brands of einkorn behave slightly differently. See this post for more details: https://www.breadexperience.com/making-sourdough-einkorn-loaves/

      If you don’t get the results you are looking for this time, try holding back some of the water in the final dough and see if that helps.

Leave a Reply

Your email address will not be published. Required fields are marked *

Recipe rating 5 Stars 4 Stars 3 Stars 2 Stars 1 Star