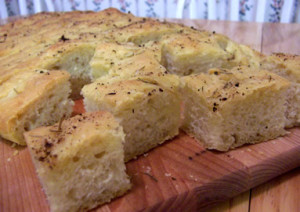
Today is Day 13 in the Bread Baker’s Apprentice Challenge. The bread we’re making this week is Focaccia. According to Peter Reinhart, true Focaccia is rustic slack dough similar to pizza with a thicker (but not too thick) crust, and big, open, translucent holes, like ciabatta.
The book presents a couple of different formulas for making Focaccia. One formula uses a pre-fermented dough and the other one retards the fermentation process through refrigeration. I chose to make my Focaccia using a Poolish (or pre-fermented dough).
Focaccia, Poolish Version
Making the Poolish (look for the list of ingredients here)
Stir together the flour, water, and yeast.
The dough should be soft and sticky and look like pancake batter.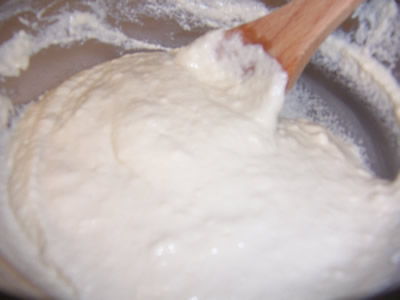
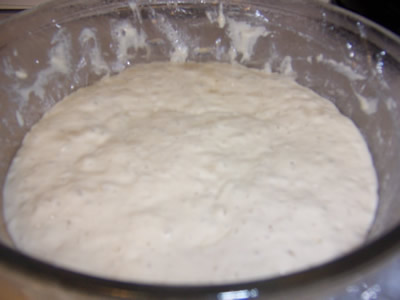
Cover the bowl with plastic wrap and ferment at room temperature for 3 to 4 hours, or until the sponge becomes bubbly and foamy. Refrigerate it immediately. It will keep for up to 3 days in the refrigerator. I made the poolish this past Wednesday night and put in the refrigerator for 2 days to give it an overnight retarding and to fit it in my schedule. I finally had time to make the bread tonight.
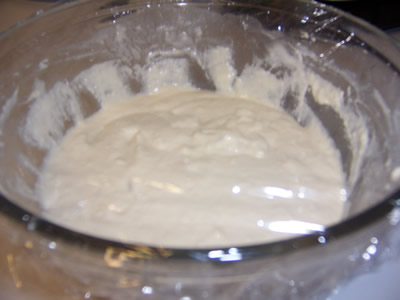
This is the poolish after sitting on the counter for 4 hours. Now it’s ready to go in the fridge.
I removed the dough from the refrigerator late Friday afternoon to take the chill off so I could bake the bread Friday night. I had company so I worked on it between playing games. It was fun and everyone enjoyed eating the bread for a snack!
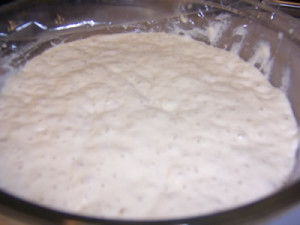
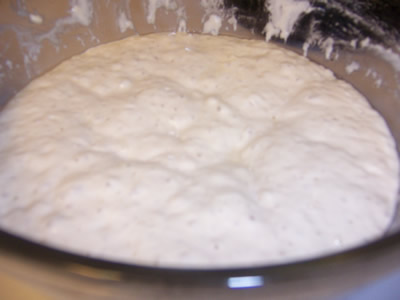
Here is the dough after being refrigerated overnight.
The dough after sitting on the counter for an hour to get the chill off.
Making the dough
-
3 cups (20 ounces) poolish
-
2 2/3 cups (12 ounces) unbleached high-gluten or bread flour
-
2 teaspoons (.5 ounce) salt
-
1 1/2 teaspoons (.17 ounce) instant yeast
-
6 tablespoons (3 ounces) olive oil
-
3/4 cup (6 ounces) water, lukewarm
-
1/4 to 1/2 cup Herb Oil (recipe in directions below)
Stir together the flour, salt, and yeast in the bowl of your stand mixer (or a mixing bowl if you prefer to do this by hand). Add the oil, poolish and water. Mix on low speed until the ingredients form a sticky ball.
Switch to the dough hook and mix on medium speed for 5 to 7 minutes until you have a smooth, sticky dough.
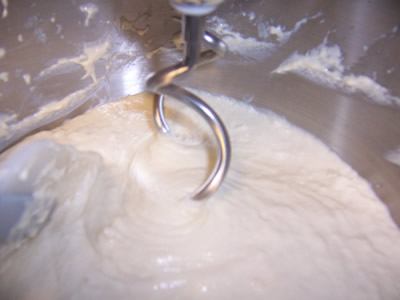
The dough should clear the sides of the bowl but stick to the bottom of the bowl. Add additional flour if necessary to firm up the dough enough to clear the sides of the bowl, but it should still be quite soft and sticky.
First Rise:
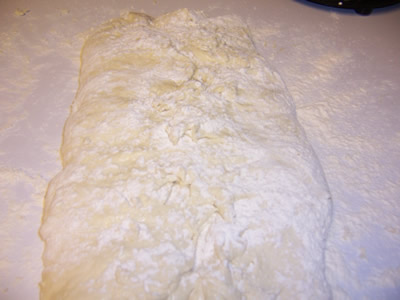
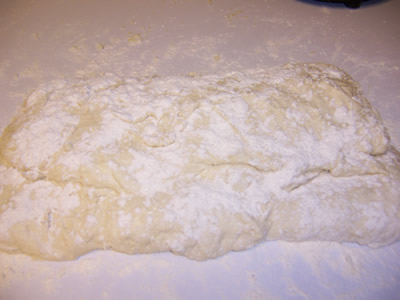
Make a bed of flour about 6 inches square on the counter. Use a bowl scraper or spatula dipped in water to transfer the sticky dough to the bed of flour on the counter.
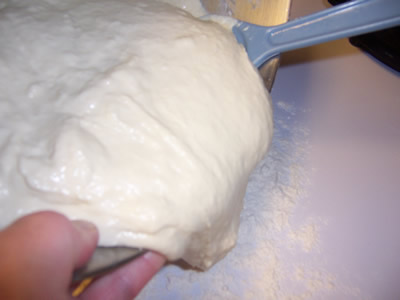
Dust the dough liberally with flour.
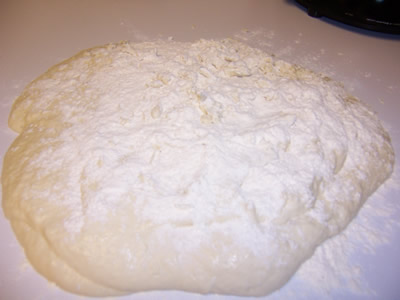
Pat the dough into a rectangle and wait 5 minutes for the dough to relax.
Stretch and Fold Method
Coat your hands with flour and perform the stretch and fold technique. Stretch the dough from each end to twice its size and fold it, letter style, over itself to return it to a rectangular shape. The dough is so wet and this is a tricky move so I didn’t get any photos of the process.
For step-by-step instructions for the Stretch and Fold Method, refer to the instructions on page 138 or for a demo, view a video of the Stretch and Fold method
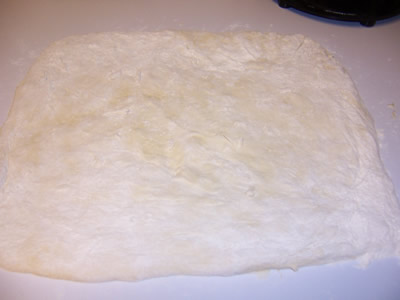
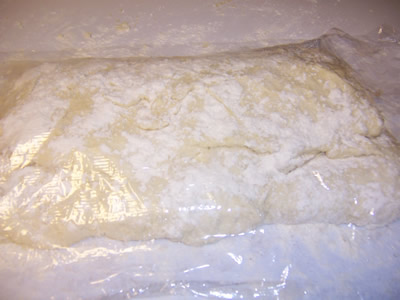
Mist the top of the dough with spray oil, again dust with flour, and loosely cover with plastic wrap. Let the dough rest for 30 minutes.
Stretch and fold again; mist with spray oil, dust with flour, and cover. After 30 minutes, repeat this one more time.
Allow the covered dough to ferment on the counter for an hour. It should swell but not necessarily double in size.
Preparing the Bread for Baking:
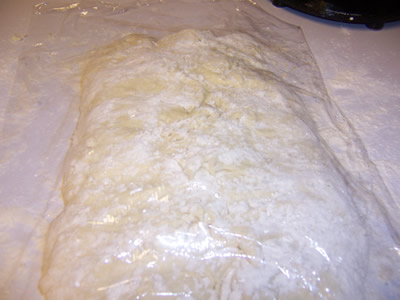
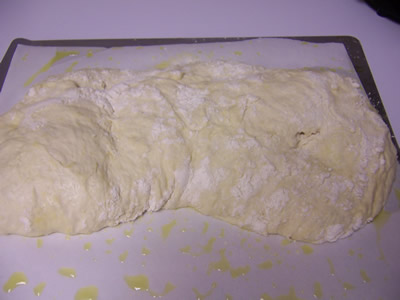
Line a 17 by 12-inch sheet pan with baking parchment and shape the focaccia as shown on page 162. I don’t have a sheet pan that big so I just used my large baking sheet.
Drizzle 1/4 cup olive oil over the paper, and spread it with your hands or a brush to cover the surface.
Lightly oil your hands and, using a pastry scraper, lift the dough off the counter and transfer it to the sheet pan, maintaining the rectangular shape as much as possible.
Herb Oil
The instructions say to spoon herb oil over the dough. The herb oil is made with 2 cups of olive oil. I couldn’t bring myself to use that much oil because I only had extra virgin olive oil so I decided to check on how KAF made their Focaccia. They only use about 2 tablespoons of olive oil along with rosemary, ground pepper and coarse salt. I decided I could live with that so that’s what I used instead of the herb oil. However, I added more as needed.
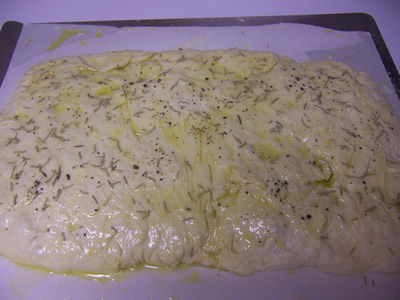
Use you fingertips to dimple the dough and spread it to fill the pan. Use more oil if needed to to ensuer that the entire surface is coated with oil. Since I’m using a baking sheet, I didn’t worry about filling the pan. I just spread it out trying to keep the thickness as uniform as possible.
Note: The purpose for dimpling is to degas part of the dough while preserving gas in the non-dimpled sections.
Loosely cover the pan with plastic wrap. Proof at room temperature for about 2 hours, or until the dough fills the pan.
It was really hot so I only had to proof it a little over an hour. About 15 minutes before baking, drizzle on more herb oil. Since I didn’t use the herb oil, I drizzled a couple more tablespoons of olive oil, then added some extra herbs to give it additional flavor. Then I dimpled it again.
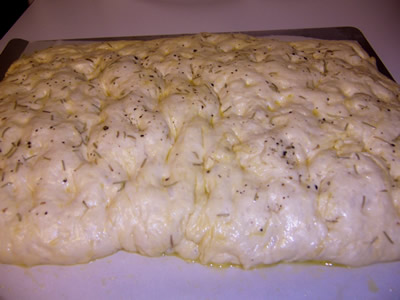
Let the dough relax for 15 to 20 minutes before baking to allow the gas to build back up. It will rise to almost 1 inch in thickness.
Baking the Bread
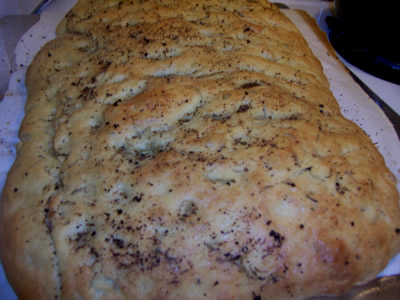
Preheat the oven to 500 degrees F. with the oven rack on the middle shelf. Place the pan in the oven and lower the oven setting to 450 degrees F. Bake for 10 minutes.
Rotate the pan 180 degrees and continue baking for 5 to 10 minutes, or until the dough begins to turn a light golden brown. You can add additional toppings at this point and continue to bake for 5 to 10 more minutes, but I decided not to add any additional toppings. I like the herb flavor.
Remove the pan from the oven.
Cooling and Serving the Bread
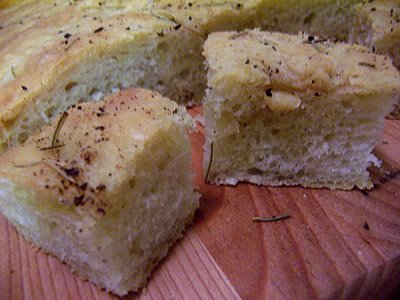
Immediately transfer the focaccia out of the pan onto a cooling rack. Allow the focaccia to cool for at least 20 minutes before slicing or serving.
I had company waiting to eat it this bread as soon as it was finished. I tried to sneak finishing it while they were playing a game, but they smelled it. Of course! They were chomping at the bit so it was hard to get photos before they started devouring it.
Thanks for joining us this week in the Bread Baker’s Apprentice Challenge. See you next time…
Happy Baking!
Cathy
ATigerInTheKitchen says
Very nicely done! Congrats …
Cathy (breadexperience) says
Thanks! Have you made this bread yet?
Paige says
Very tasty! I did change a bit of the process, but your detailed directions gave me a great start to making my bread.
Cathy (breadexperience) says
Great! I’m glad you enjoyed it. Focaccia is one of my favorites.