Do you want to learn how to make bread?
Great! You’ve come to the right place. We love baking bread and want to share our passion with you.
The 12 Stages of Bread Making
Let’s learn the basics of how to make bread by going step-by-step through the twelve stages of bread-baking. We’ll be making a Classic White Sandwich Bread. The recipe is from King Arthur Flour.
Step 1: Mise en Place or “everything in its place”.
The success of your bread-baking experience depends on how organized you are so don’t skip this step.
Begin by getting all of your tools and ingredients ready and within arms length.
Read the instructions from start to finish to make sure you have all of the ingredients and the necessary tools as well as the timing down. Scale your ingredients by measuring them with a scale or using the scoop method – i.e. using measuring cups.
Ingredients for Classic White Sandwich Bread:
- 1 cup + 2 tablespoons, to 1 1/4 cups lukewarm water*
- 1 heaping tablespoon honey
- 2 1/4 teaspoons instant yeast
- 1 3/4 teaspoons salt
- 2 tablespoons soft butter
- 4 cups King Arthur Unbleached All-Purpose Flour
- 1/3 cup Baker’s Special Dry Milk or 1/2 cup nonfat dry milk granules
*Use the lesser amount in summer or humid climates; the greater amount in winter or drier climates.
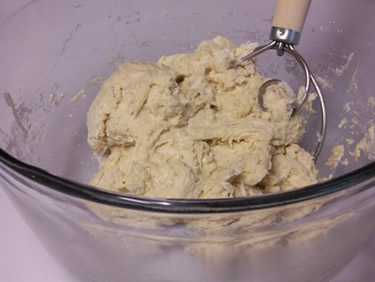
Step 2: Mixing
Mixing can be performed by hand using a large spoon, your hands or a dough whisk; or by machine, using a bread machine, stand mixer, or food processor. Mixing has three purposes: to distribute the ingredients, develop the gluten, and initiate fermentation.
For the classic sandwich bread, mix all of the ingredients in the order listed to make a smooth dough. You can use a dough whisk, large spoon, or a mixer to mix the ingredients until are thoroughly incorporated.
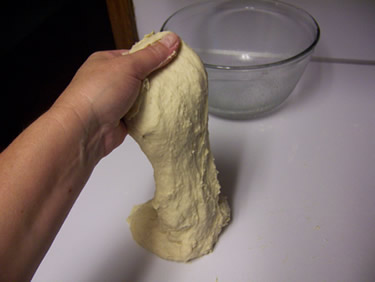
Then, place the dough on a counter sprinkled with flour and knead it until it is smooth.
Use the push/pull method to knead it.
The dough shouldn’t be soft or stiff; it should be smooth and feel bouncy and elastic under your hands.
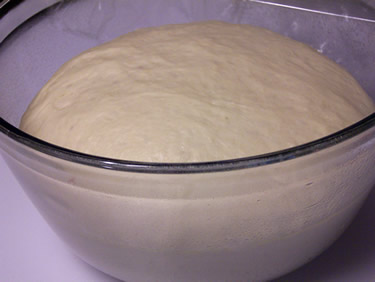
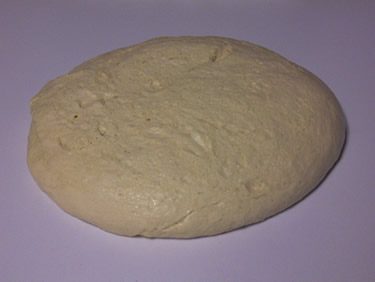
Step 3: Bulk (Primary) Fermentation
Fermentation is one of the most important steps in learning how to make bread.
It doesn’t matter how good your shaping technique is or how well your oven bakes, if the dough is not properly fermented, it will not produce a great bread.
To ferment the classic white sandwich bread dough, place it in a lightly greased bowl, or large (8-cup) measuring cup.
Cover it, and let it rise for 60 to 90 minutes. It should be quite puffy, though not necessarily doubled in size.
Step 4: Punching Down
Punching down is also called degassing. This is when the dough begins to enter its secondary fermentation.
Gently deflate the dough by removing it from the bowl to the counter.
Steps 5 and 6: Dividing and Rounding
Dividing the dough into individual pieces is the next stage, followed by rounding (a preliminary shaping) and benching (a rest period).
Since we’re only making one loaf, this dough doesn’t need to be divided. Nor does it need to be rounded either since we’ll be forming a loaf shape. Rounding is a method used with artisan breads, but with regular loaf breads, it’s not necessary.
Step 7: Benching
Benching is where you allow the dough to rest before shaping. The purpose of this stage is to relax the gluten so that it will be easier to handle during the final shaping.
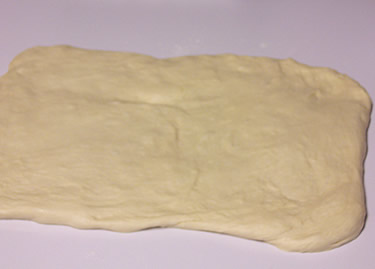
We don’t really need to do that for this bread because this dough is easy to work with. We’ll just flatten the dough into a rectangle and then complete the shaping process. The rectangle should be about 5 inches wide and 6 to 8 inches long. This is a large loaf so my measurements are a little wider and longer.
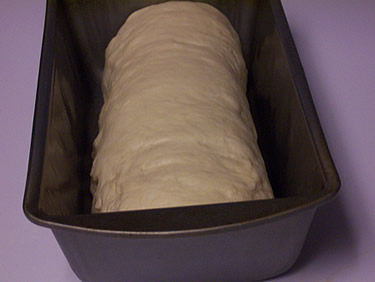
Step 8: Shaping and Panning the Loaves
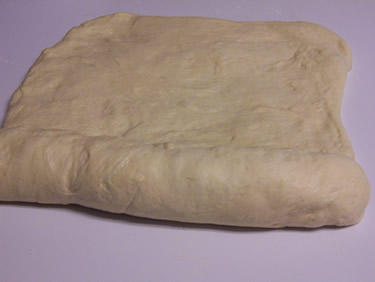
The easiest way to shape a sandwich loaf is to roll it up jelly roll style. Starting from the short side of the dough, roll up the length of the dough into a log shape one section at a time.
The loaf will spread out as you go and will eventually extend to 8 or 9 inches. Pinch the seam closed with the back edge of your hand and rock the loaf back and forth to even it out.
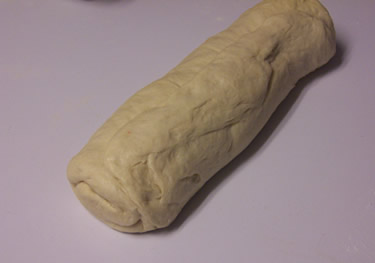
Place the loaf seam-side down in the pan. Keep the surface of the loaf even at the top. The ends of the loaf should touch the ends of the pan to ensure an even rise.
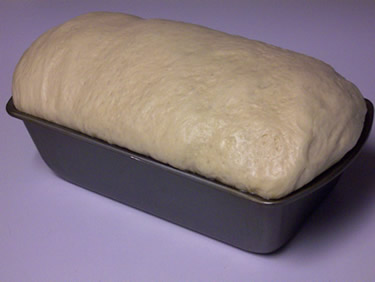
Step 9: Proofing the Loaf (Secondary Fermentation)
Cover the pan, and let the dough rise for 60 to 90 minutes.
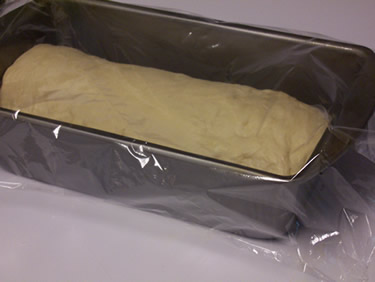
Until it’s crowned 1″ to 1 1/2″ over the rim of the pan.
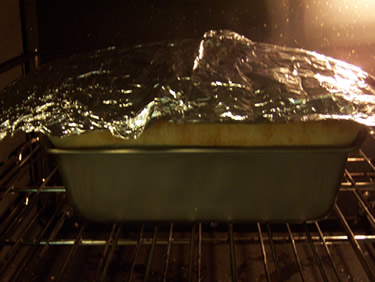
Step 10: Baking
Preheat the oven to 350 degrees. Bake the loaf for 20 minutes. Check the loaf, then bake for an additional 15-20 minutes, until golden brown.
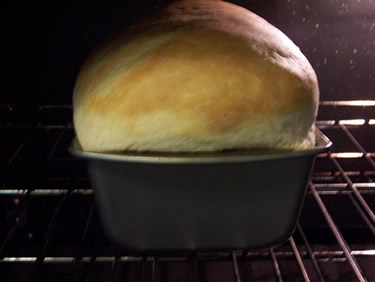
To keep the top of the loaf from burning, tent it lightly with aluminum foil. Use an instant-read thermometer to check for doneness. When inserted into the center of the loaf, the thermometer should display 195°F to 200°F.
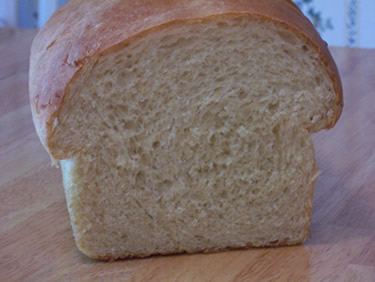
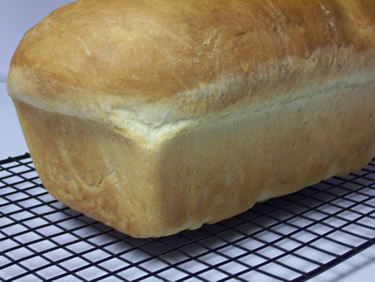
Step 11: Cooling the Bread
Remove the bread from the oven, and turn it out onto a rack to cool.
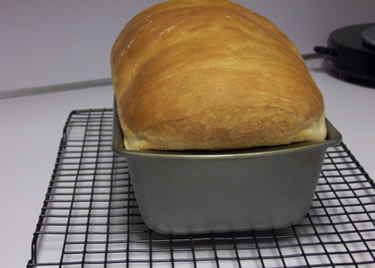
If you want to fully taste the flavor of the bread, it’s best to let it cool completely by allowing it to cool at room temperature on a cooling rack. Using a cooling rack will prevent the bottom from getting soggy.
Step 12: Storing and Eating Bread
Now that we’ve learned how to make bread. Let’s eat and enjoy the bread.
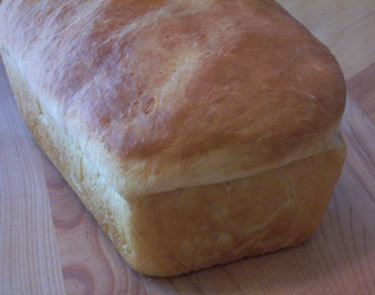
When completely cool, wrap in plastic, and store at room temperature. Either freeze the loaf or keep it in a cool, dark place. If you plan to freeze the loaf, it’s best to slice it first because then you only have to thaw the slices you want to use instead of the whole loaf.
Sources:
Clayton, Bernard. Bernard Clayton’s New Complete Book of Breads. 2006 Simon & Schuster.
Hammelman, Jeffrey. Bread: A Baker’s Book of Techniques & Recipes. 2004 John Wiley & Sons, Inc.
Hensperger, Beth. Bread Made Easy – A Baker’s First Bread Book. Ten Speed Press 2000.
Copyright © 2010 King Arthur Flour Company, Inc. All rights reserved.
Reinhart, Peter. The Bread Baker’s Apprentice. Ten Speed Press 2001.

Yyw says
Thank you for this wonderful bread making tutorial! In step 9 where the dough is due for second rise, my dough did not rise much, and consequently after I baked it, the output is v stiff and quite dry. Note: I use whole spelt flour 2cups, and 1/2 c milk as liquid, and 2tbsp oil, no other liquid used. Is the failure for the second rise because of a dry dough?
The dough felt elastic after the first proof. So, what did I miss?
Thanks master baker for your kind reply! I am truly grateful for this tutorial, you all are wonderful Angels!
Cathy says
Hello, I’m glad you enjoyed the bread tutorial. One thing to keep in mind is that this tutorial was created for white flour. When you substitute different flours, especially whole grain flour, the characteristics/variables will be different.
Here are some things to consider when working with spelt:
Spelt doesn’t absorb liquid the same way that regular white flour does so perhaps too much flour was added during the mixing of the dough. In addition, spelt makes a very delicate dough so it requires a shorter mixing time. Not sure how you mixed the dough, but I find that it does well using the fold and turn method in the bowl rather than mixing with a stand mixer. It’s also a good idea to give the dough an autolyse (rest) for 15-20 minutes before kneading to allow the dough time to absorb the liquid. This helps to prevent adding too much flour during mixing.
You also mentioned the failure of the second rise. Another thing to consider is that gas accumulates faster in doughs made with spelt so the dough should be slightly under proofed. Only let it proof until the loaf almost looks perfect. If it looks perfect, it’s over proofed. Perhaps this was part of the issue as well. Hope this helps.
patrick says
thanks for the tutorial it helps me alot in my research
A. Pereira says
the bread i prepared became very hard as soon as it cooled down. where did i go wrong?
Cathy says
Hello, what kind of bread did you make? Was it whole wheat? It sounds like perhaps you added too much flour and/or baked it too long.
Kiruba says
Thank you so much it helped in my science project .
Temmy says
I baked mine today and noticed it did not rise, and its hard, how much time should be used for baking?
Cathy says
If you are asking how long you bake the bread featured in this post, it should be baked at 350 degrees F. for about 20 minutes.
Kelly aka Sew Lambitious says
In addition to the initial 20 min bake time, you tent the bread with foil and bake an additional 15-20 mins (35-40 mins total). An instant READ thermometer should READ 195-200°F.
Cathy says
Thank you. You’re right! It does need the extra 15-20 minutes bake time. My previous reply omitted that information.