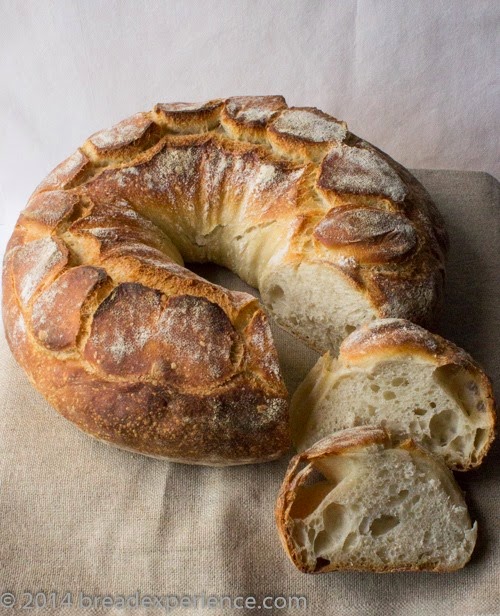
This lovely French Couronne is made with a mixed starter and old dough. Couronne means crown, and this one is adorned with a lovely string of pearls on top.
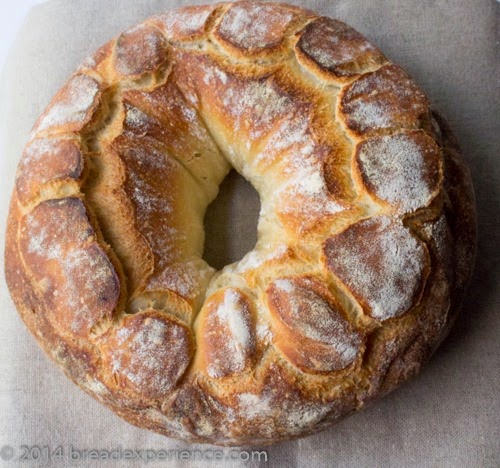
Karen of Karen’s Kitchen Stories chose this crown loaf for the BOM (bread of the month) for the Artisan Bread Bakers FB group. It was challenging and fun to make.
As the title suggests, this bread is made with old dough. It also utilizes two starters. For the old dough, you can use any pizza-type dough, or a stiff starter if you don’t have any old dough.
All of my starters are 100% hydration so to make this bread, I took half of this starter (which hadn’t been fed in two weeks) from the refrigerator and fed it some flour and just enough water to hydrate it. I let it ripen for 4 –6 hours at about 70 degrees in a proofing box. It still wasn’t the consistency of pizza dough so I adjusted for this by adding more flour to the final dough.
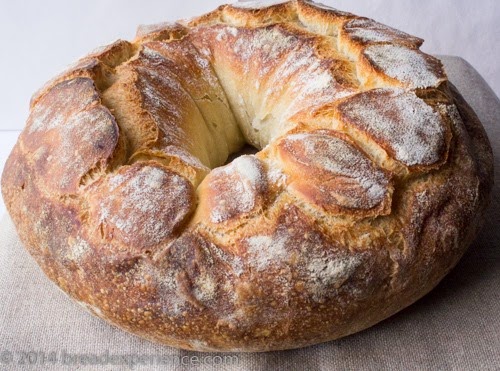
The first time I made this loaf, it didn’t brown correctly. I ran through different scenarios to figure out what went wrong and documented my findings in a separate post Bread Science – Why is this Couronne loaf so pale?
In this post, I’m focusing on what went right.
When I made this loaf the second time, I let the dough cold ferment in the refrigerator overnight due to my schedule, and this turned out to be the key. I also baked it in a cloche instead of on a baking stone to ensure even heat and steam. I’m happy to say, this one turned out wonderfully.
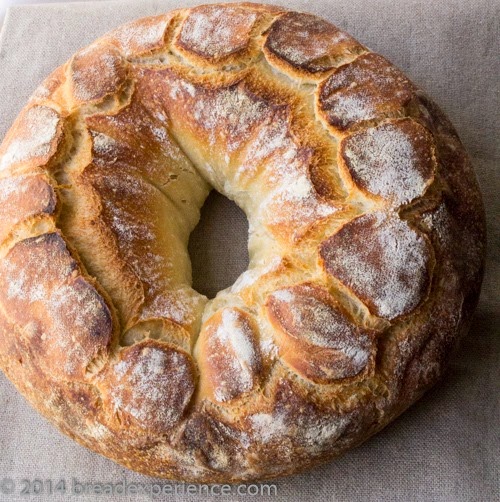
The dough for the couronne takes a couple of days, but don’t let that stop you. This is a fabulous loaf and your efforts will be rewarded. You’ll just need to plan accordingly. Most of the time is spent fermenting the starters, and if you choose to do it the way I did, the final dough can be refrigerated overnight as well.
Mixed Starter Couronne with Old Dough
Makes: 1 large round loaf
Original recipe by Steve Sullivan of the Acme Bread Company
Adapted from: MIXED STARTER BREAD COURONNE – from Baking with Julia by Dorie Greenspan
Old-dough starter
- 1/2 ounce firm starter
- 1/4 cup warm water
- 2/3 cup unbleached all-purpose flour
Second Starter
- All of the old-dough starter
- 1/4 cup warm water
- 3/4 cup unbleached all-purpose flour
Final Dough
- 1 1/4 cup water
- 1/2 teaspoon instant yeast
- All of the 2nd starter, cut into pieces
- 3 1/3 cups (14.15 ounces) unbleached all-purpose flour, plus extra for sprinkling
- 1 tablespoon Kosher salt
Instructions:
Making the Old Starter:
Cut the old dough into pieces and add the pieces to a medium bowl. Pour the warm water over the pieces to break them up before mixing in the flour. Let the mixture sit for about 5 minutes.
Add the flour and mix until fully incorporated using a Danish dough whisk or a large wooden spoon. Once the dough gets too stiff to mix with the spoon, transfer it to a lightly floured surface and knead it by hand until it is thoroughly mixed. Cover the bowl with plastic wrap and let it rise in a warm place for about 8 hours. I placed the dough in a proofing box and let it proof at about 70 degrees F. for 8 hours. Then I placed the dough in the refrigerator overnight.
Making the 2nd Starter:
Remove the old dough starter from the refrigerator and chop it up into smaller pieces using a bench knife. Pour in the water and let it sit for about 5 minutes. Add the flour and mix using a Danish dough whisk or wooden spoon until the flour is fully incorporated. Let the second starter rise for four hours, then refrigerate it for 1 to 8 hours.
Making the Final Dough:
Remove the second starter from the refrigerator. Break it up into smaller pieces using a bench knife. In the bowl of a stand mixer, add the water, yeast, and starter pieces. Let the mixture sit for about 5 minutes.
Add the flour and using a wooden spoon, stir for a minute or so just to hydrate the flour. Using the dough hook, mix on low (or 1st) speed on the mixer to fully incorporate the ingredients. Let the dough rest for 10 minutes.
Sprinkle the salt over the top of the dough. Turn the mixer to medium-high (2nd) speed and continue mixing for 8 minutes.
Bulk Fermentation:
Place the dough in a clean, oiled bowl and cover with plastic wrap. Let the dough rise for 90 minutes in a warm spot (about 85 degrees F.)
After 90 minutes, remove the dough to a lightly floured surface and gently fold and stretch the dough over itself from all four sides. Place the dough back in the bowl, cover and let it rise for another 45 minutes.
At this point, you can continue to the shaping phase or place the bowl in the refrigerator and let the dough rest overnight. This is what I did.
Shaping and Proofing the Crown:
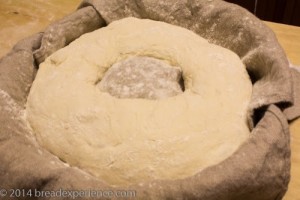
To make a proofing container for the couronne, take a 10-inch cake pan or springform pan and place a small (3-to 4-inch) bowl upside down in the middle. Cover with a tea towel or baker’s couche, and rub the towel with flour.
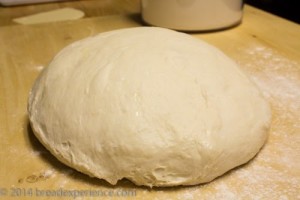
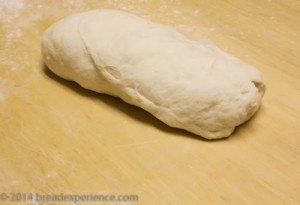
Remove the dough from the refrigerator and place it on a lightly floured surface. Cut off a 5-ounce piece. Pat it into a rectangle, and fold it over itself several times to develop tension. Roll it into a small log, cover and set it aside.
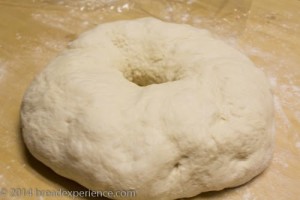
Shape the rest of the dough into a rough round. Roll up your sleeves and plunge your elbow into the center of the dough to create a hole. You’ll need to twist it back a forth a bit to make the hole all the way through the dough. Come on, it will be fun! Now, using a floured hand, continue to expand the hole. Cover it with plastic wrap or a kitchen towel and let it rest for 15 minutes.
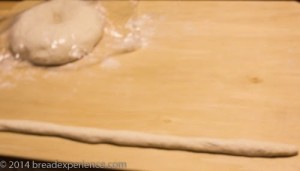
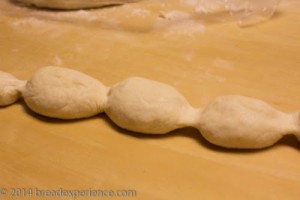
While the crown is resting, make the “string of pearls.” To do this, you’ll roll the 5-ounce piece of dough into a rope about 24 inches. This might take a little while so just be patient. Roll it out using your fingers from the middle to the outside trying to keep the width uniform. Let the rope rest for 5 to 10 minutes, then roll it some more. Let it rest again if necessary until you’re able to roll it the full 24 inches. Allowing the dough to rest periodically will keep it from snapping back.
Note: If you have too much flour on your work surface, the dough doesn’t roll very easily so I wet my fingers slightly with water. Be careful not to use too much water or the dough will stick to the surface.
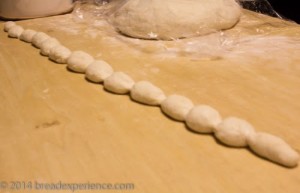
To form the pearls, use the side of your hand and make indentations in the rope by sliding your hand back and forth every inch or so. I found that this worked better with the cold dough. Just be gentle, so you don’t cut completely through the dough.
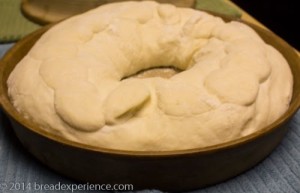
Take the string of pearls and lay them in the proofing pan, circling the small bowl.
Take the rest of the dough, carefully flip it over into the proofing pan, and gently lay it on top of the pearls. Cover the pan with plastic wrap or a kitchen towel and let it rise for 90 minutes.
 |
 |
 |
 |
 |
 |
 |
 |
Baking the Loaf:
About 45 minutes before you plan to bake the loaf, place a cloche on the bottom shelf and remove the top shelf. Alternatively, you can bake the loaf on a baking stone and use a steam pan or iron skillet filled with ice to create steam. I used a cloche to bake this loaf. The crown fit perfectly inside it.
Preheat the oven and the baking stone, or cloche to 450 degrees F. for 45 minutes.
If you are using a cloche to bake the loaf, once the dough is ready, remove the cloche from the oven to a surface covered in thick towels or pot holders. This is to prevent it from getting cracked when it is exposed to different temperature changes. Sprinkle the cloche with cornmeal or semolina, then carefully flip the loaf from the proofing container onto the base of the cloche.
If you are baking the loaf on a baking stone, place a piece of parchment paper over the cake pan, cover it with a peel, and carefully flip the whole thing over. Remove the cake pan and towel or couche. Then carefully transfer the loaf (along with the parchment paper) to the preheated baking stone. Add several ice cubes to the steam pan or iron skillet and immediately close the oven door. If you prefer, cover the crown with a metal bowl instead of using a steam pan.
After closing the oven door, immediately reduce the temperature to 425 degrees F. and bake the loaf for 20 minutes with the lid on (cloche lid or metal bowl). Then bake the loaf for 20 to 25 minutes more without the lid. The loaf should be brown and the interior temperature should read 200 to 210 degrees F.
Cool the loaf completely on a wire rack before slicing and serving.
I’m sharing this loaf with Yeastspotting.
Happy Baking!
Cathy
MyKitchenInHalfCups says
Glorious! Perfect pearls.
Cathy W. says
Thanks Tann!
Karen Kerr says
Love the shaping photos!!
Cathy W. says
Thanks for choosing this bread Karen! It was great!
LS says
I know what I’m baking next! 🙂
Cathy W. says
You definitely need to make this one. Happy Baking!