
This month is the Bread Baking Babes Bakers’ Dozen Anniversary. To commemorate this special occasion, our challenge was to make Uzbek Stamp Bread.

Uzbek flatbread, also known as Non or Nan, is fairly thick around the edges and flattened in the middle. Common throughout Central Asia, these flatbreads are usually baked on the hot clay walls of tanurs – ovens similar to the jar-shaped Indian tandoori oven, but tall enough and wide enough to walk into (when cold), have arched ceilings, and are reached into from the side at about arm height, not through the top.
Using a Bread Stamp
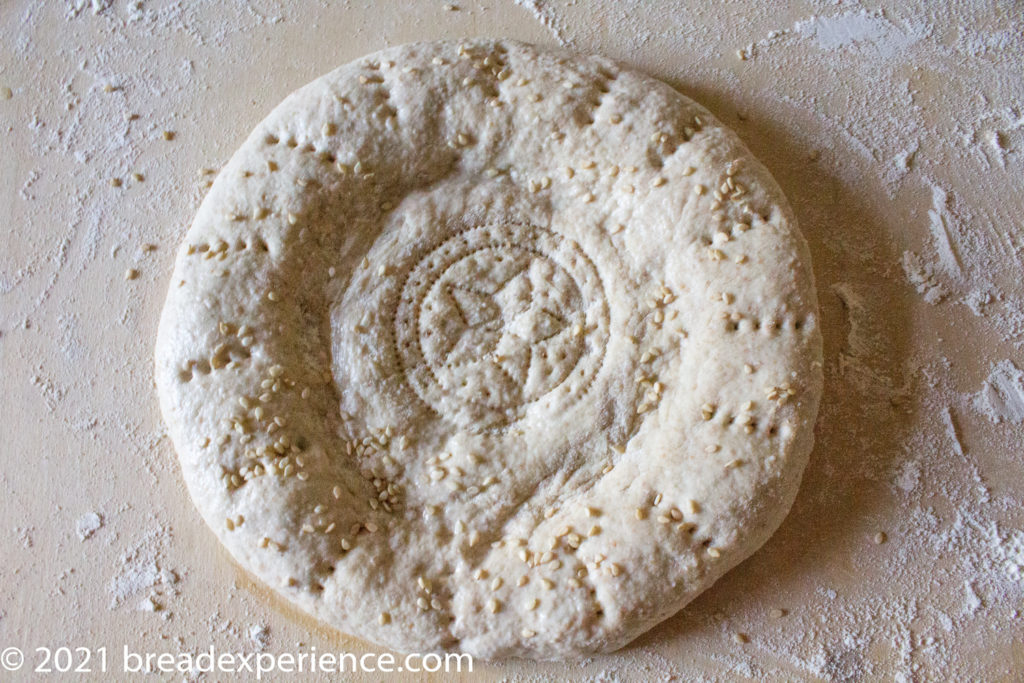
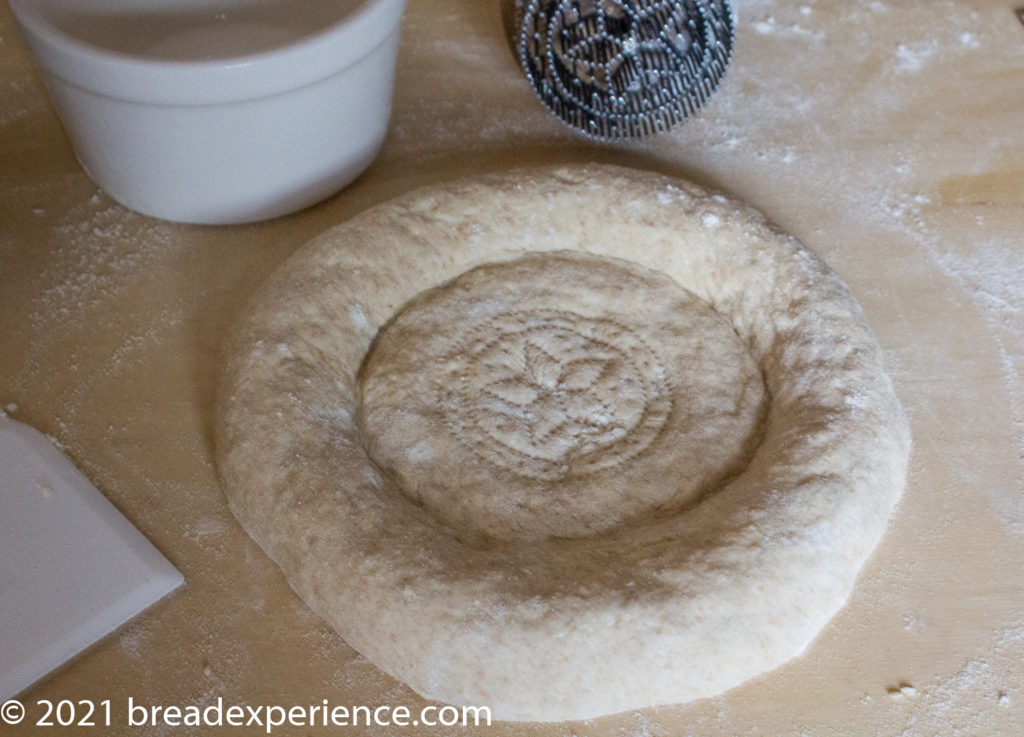
The secret to making this flatbread is to use a bread stamp (chekich), or the tines of a fork, to flatten the bread in the center and create a lovely design in the dough.
I bought my bread stamps on Etsy in the ArtsyUzbek shop. The stamps were shipped from Uzbekistan, wrapped in paper with string and sealing wax, and included a bag for storing. It was a lovely presentation.

You can also find the stamps, along with a video of bakers shaping and baking the loaves, here https://artsyuzbek.com/
Don’t worry if you don’t have a bread stamp; you can make this bread without it. Use the tines of a fork to create patterns in the middle of the dough.
Practice makes perfect, sort of
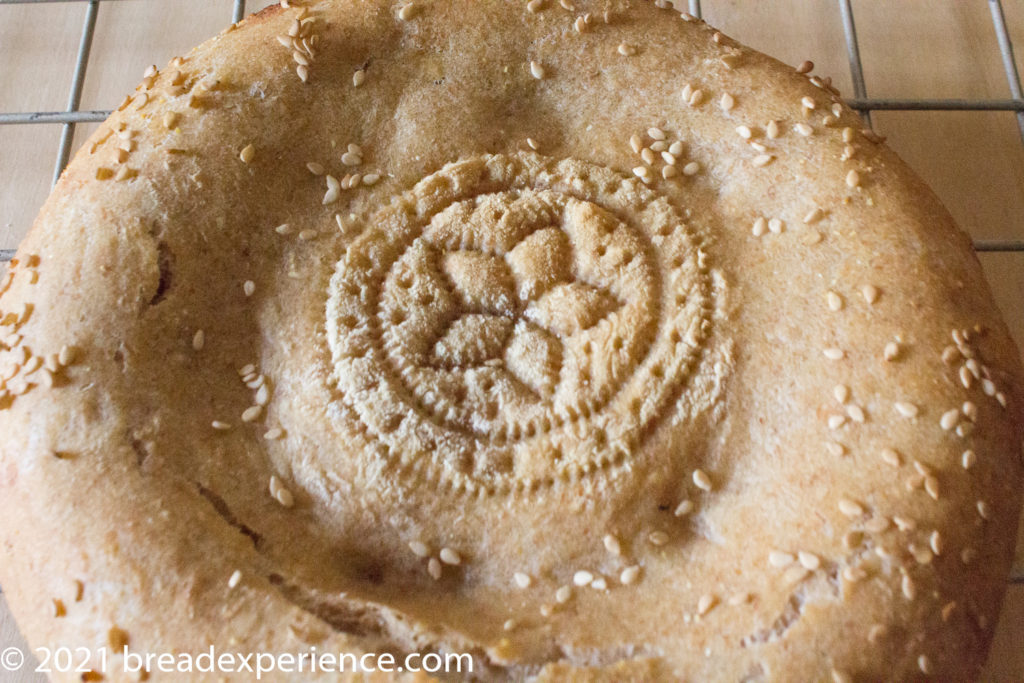
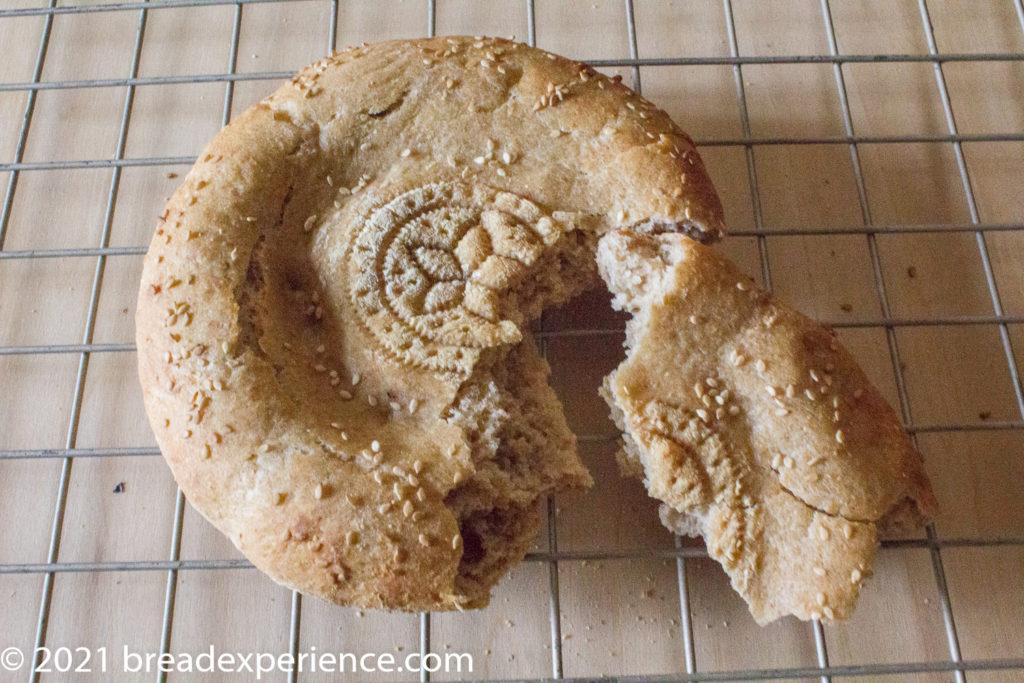
I made this bread eight times using two different recipes. I poked and prodded the dough to keep it from puffing up in the middle, but I couldn’t quite get the flatbreads to flatten in the middle and imprint the design at the same time. I either got a nice stamp imprint and a puffy middle, or a thinner and crispier middle with a faded design.
The first few times I made this bread, I used an adapted sourdough version from Samarkand: Recipes & Stories from Central Asia & the Caucasus by Caroline Eden & Eleanor Ford.
Tanna of My Kitchen in Half Cups, our host kitchen this month, provided a yeast version and a sourdough version; however, I decided to go with a slightly different version that uses 25% sourdough.
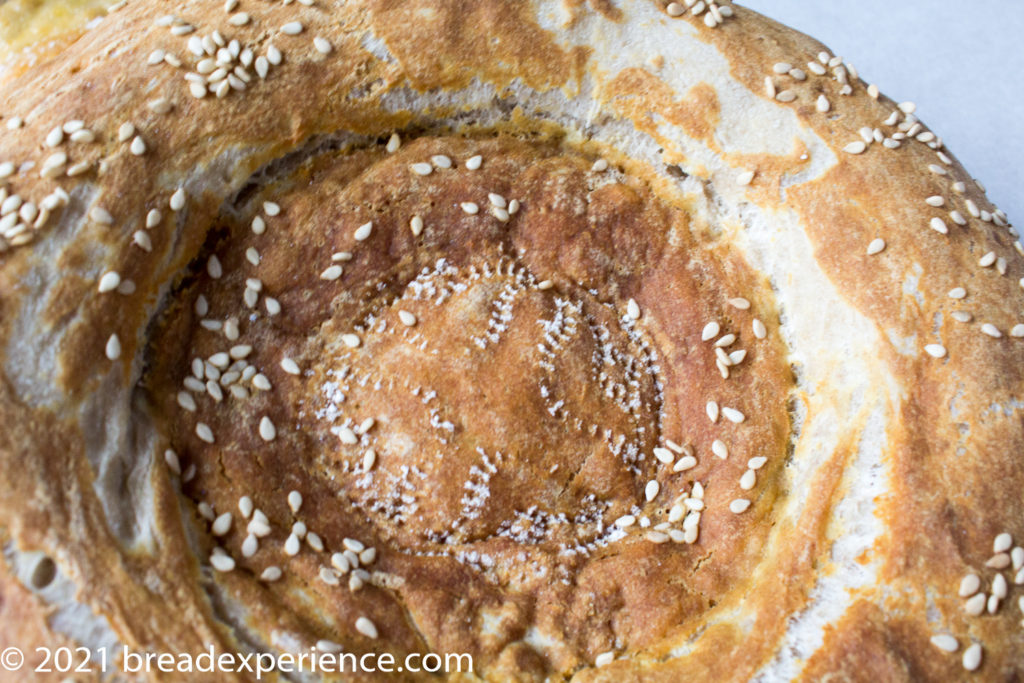
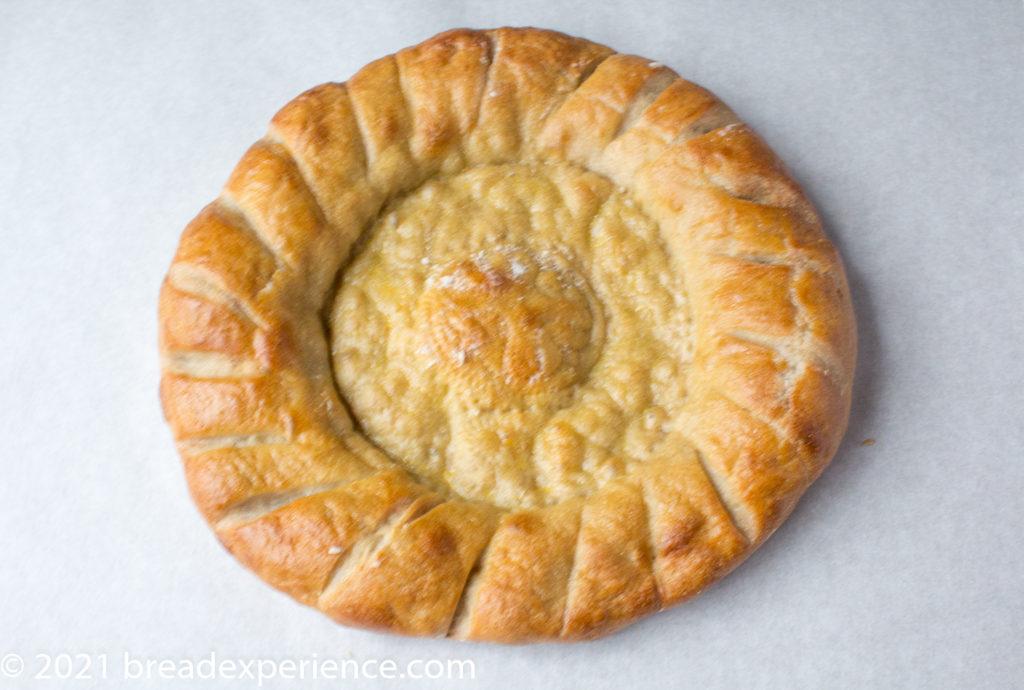
The resulting bread wasn’t very flat in the middle, but I got the best imprint from this one. I also thought this one had the best flavor. I brushed the loaves with water and sprinkled sesame seeds on top. The flatbreads tore around the middle, even though I had poked them with a fork. So, I thought perhaps the trick was to use a different dough.

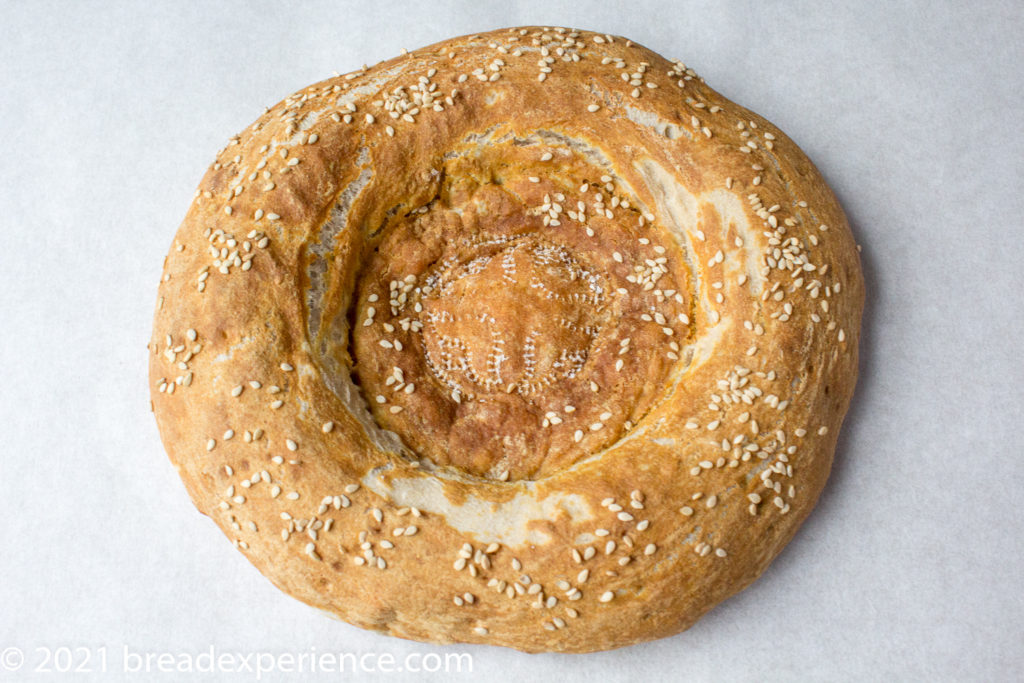
I decided to try making some with the sourdough pita dough recipe from A Blessing of Bread by Maggie Glezer. The loaves made with the pita dough were flat in the middle and crispier than the loaves made with the other dough, but the imprint didn’t show up very well after the flatbreads were baked.

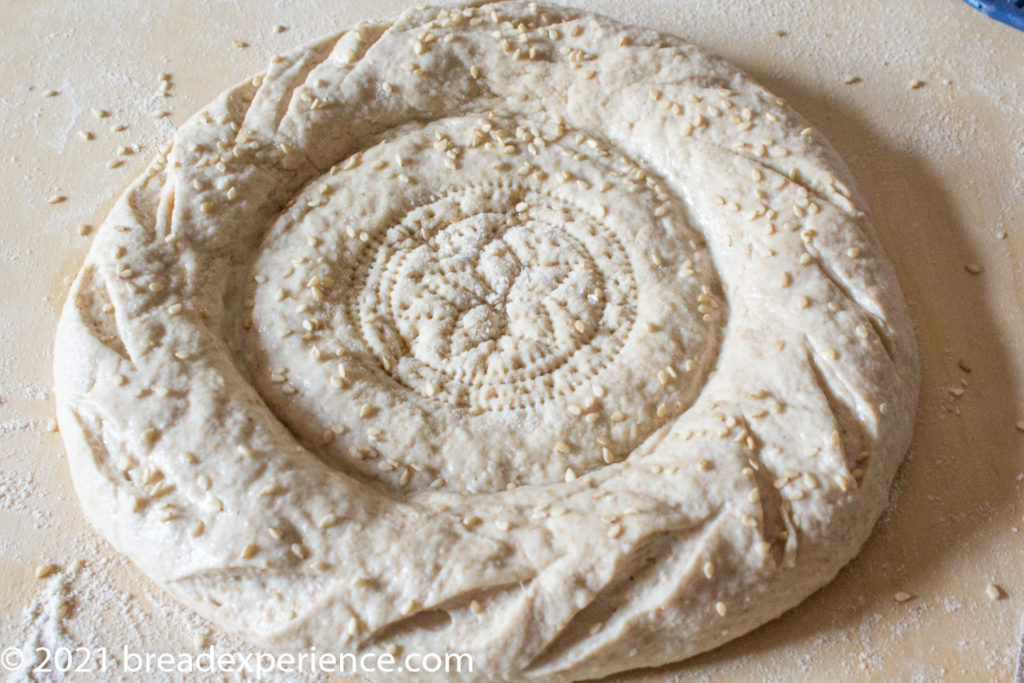
Stamping the loaves had proved to be trickier than I thought. When I didn’t stamp them quickly and relatively lightly, the stamp would stick in the dough and make a big mess (of the dough and the tines of the stamp). On some of the loaves, I ended up stamping them several times because the imprint seemed to fade while I was waiting for the oven to preheat.
For the pita-dough loaves, I used an egg wash on a couple of the flatbreads and a baking soda wash on the others. I forgot to add the sesame seeds to the egg-washed loaves, but I liked the color of that batch. The baking-soda-washed loaves had a darker color and an interesting, crispy flavor, almost like a pretzel, but not quite.
After all of my experimenting, I decided I liked the Sourdough Non version the best, so I’ve included that recipe below. I think one of the keys may be to allow the dough to ferment longer on the counter before adding the stamp, but I haven’t tried that yet.
You can use an egg wash to add a lovely golden sheen, but I preferred the flavor when using just a water wash along with the sesame seeds.

Check out this article for fabulous pictures of many different styles of bread made with a bread stamp!
Print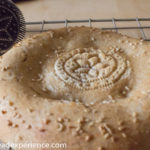
Sourdough Uzbek Bread Stamp Bread (Non/Nan)
- Yield: 1 Loaf 1x
Description
This Sourdough Uzbek Stamp Bread is fairly thick around the edges and flattened in the middle using a bread stamp to impart a lovely design.
Ingredients
- 50 grams sourdough starter, active, recently fed
- 125 grams all-purpose flour (I used stoneground all-purpose flour)
- 30 grams whole grain spelt flour (I used freshly milled flour)
- 20 grams whole grain rye flour (I used freshly milled flour)
- 100–110 grams warm water, or more as needed
- 1/2 teaspoon organic sugar (to add color to baked loaf)
- 3/4 teaspoon sea salt
- 1/2 teaspoon sesame, or black onion seeds
Instructions
- Feed your starter the evening before you plan to bake this bread. Let rest overnight at warm room temperature.
- The next day, add 50 grams of fed starter to a medium bowl. Pour 100 grams of the water over the starter and mix to incorporate.
- In a separate bowl, whisk together the flour and sugar. Add the flour mixture on top of the starter mixture and stir using a Danish dough whisk, then work it with a dough scraper until mixed thoroughly.
- Cover the bowl, let rest for 20-30 minutes at warm room temperature.
- Sprinkle the salt over the dough along with 10-15 grams water, if needed, and work in the salt with your fingers until thoroughly incorporated in the dough.
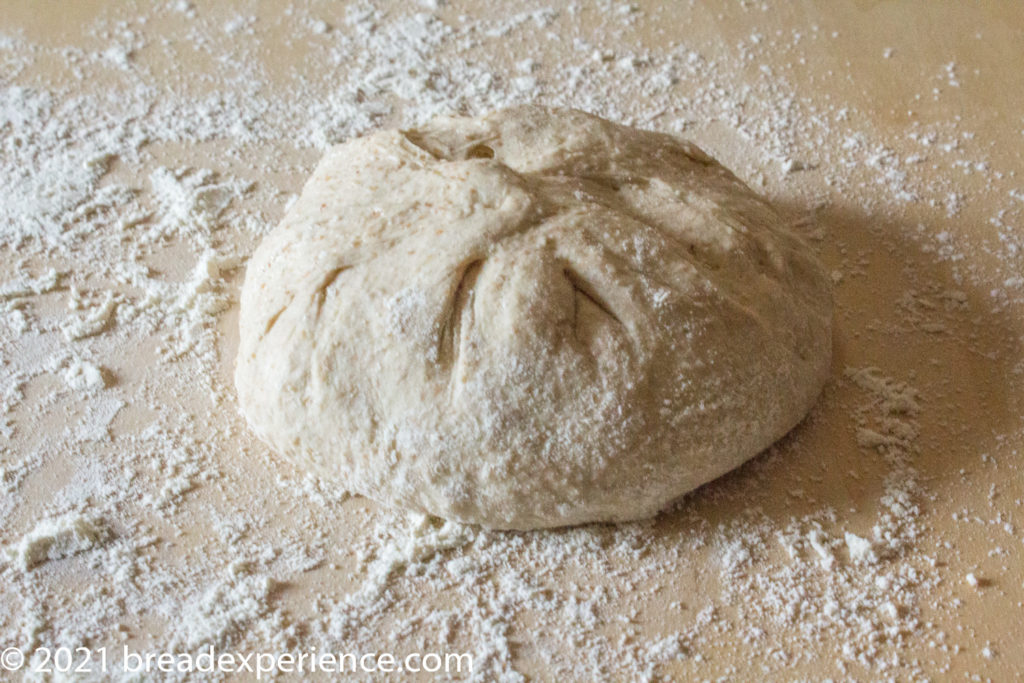
- Cover, let rest for a total of 3 ½ – 4 hours. Stretch and fold the dough 2 times at 45-minute intervals, then let the dough rest for the remaining 2- 2 ½ hours.
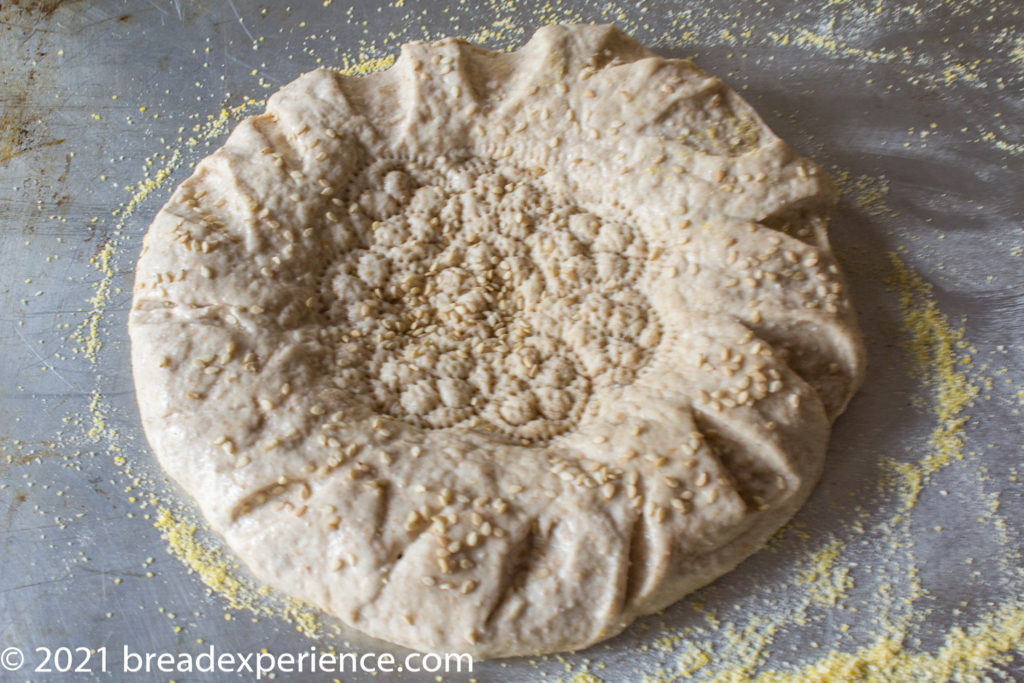
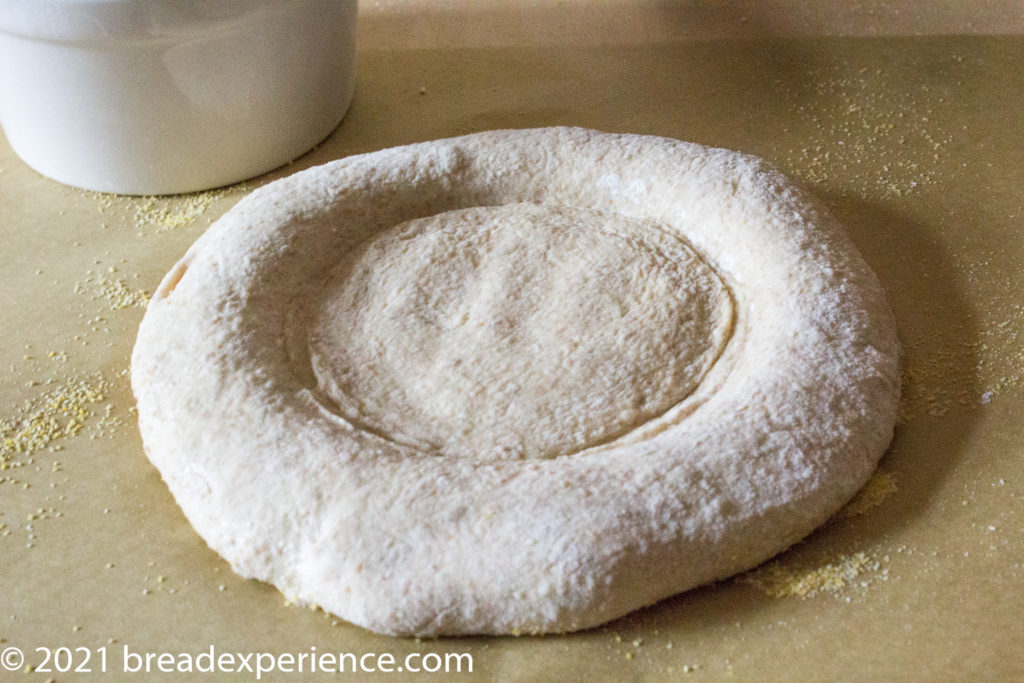
- Knock the air out of the dough and form it into a domed round. Sit it on a piece of parchment paper and cover with a large bowl. Let prove for about another 45 minutes to an hour; about doubled in size again.
- Preheat the oven and baking stone to 500°F, or as hot as it will go.
- Make an indentation in the middle of the bread. An Uzbek baker – nonvoy – would have a special tool that creates the depression in the middle of the bread. The tool has a handle much like on the bread stamp -chekich – but the bottom is more like a ball cut in half and smushed a little flat. Lacking this special tool, you can use your hand or anything in the kitchen that resembles 1/2 a ball smushed; like a large ladle. (I tried using a ladle, but had better success with one of my small stoneware bowls because they were heavier).
- The indentation needs to be slightly larger than your bread stamp. Using the bread stamp, pierce the pattern in the middle indentation. Brush the top with butter, oil or an egg wash (or water).
- You can create steam in the oven with ice cubes or mist with water OR slide the loaf onto the hot stone and cover with a stainless-steel bowl or roasting pan.
- Bake covered for 12 minutes; Bake uncovered 5 to 10 minutes longer until the bread is golden brown and sounds hollow when tapped underneath. The internal temperature should be between 200 and 205° F.
- Category: Flatbread

Who are the Bread Baking Babes?
We are a group of breadbakers who get together every month and bake bread! We have a Facebook group if you’d like to bake along. New recipes are posted every month on the 16th.
Tanna, of My Kitchen in Half Cups, is the host kitchen this month. Check out her blog post for more details on how to participate in this month’s challenge.
For more inspiration, check out these posts:
My Kitchen in Half Cups – Tanna (host kitchen)
Karen’s Kitchen Stories – Karen
Bread Experience – Cathy
A Messy Kitchen – Kelly
blog from OUR kitchen– Elizabeth
Judy’s Gross Eats – Judy
My Diverse Kitchen – Aparna
Thyme for Cooking – Katie (roundup)

Happy Baking!
Cathy
Leave a Reply to Elizabeth Cancel reply