Learn how to make upcycled sourdough sandwich bread at home using stale or surplus loaves. Discover tips for circular baking, what breads work best, and where to buy sustainably made bread.

Exploring the World of Upcycled Bread
Bread is one of the most beloved — and most wasted — foods in the world. Millions of loaves end up in landfills each year, contributing to a growing food waste problem. But what if those leftover slices could find new life? That’s the idea behind upcycled bread — a sustainable baking trend that reuses surplus or stale loaves to create fresh, nutritious bread.
This concept is part of a broader movement known as circular baking, where bakeries and home bakers alike look for ways to reduce waste by repurposing ingredients. Some artisan bakeries are already leading the way by collecting unsold or surplus bread, drying it, and reusing it in new batches. The result? Improved texture, rich flavor, added nutrition — and less food going to waste.
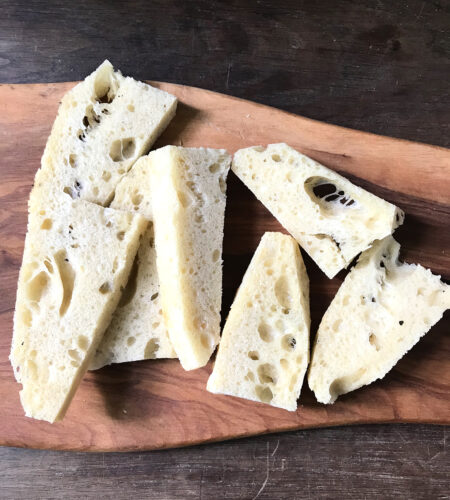
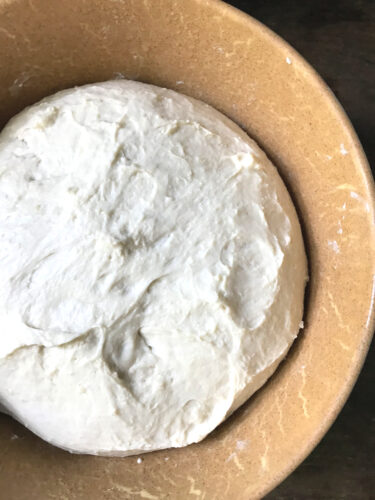
I first came across the idea of upcycled bread while researching baking trends, and I was immediately intrigued. Could I take a stale loaf from my bread bin and turn it into something delicious and new? I decided to give it a try by making a simple upcycled sourdough sandwich bread, using a few slices from a week-old loaf of Pane Incamiciato.
Let’s just say, I didn’t have any trouble finding taste testers. My millennial testers loved the concept of reusing ingredients, and my youngest son was eager to share each new loaf — so eager, that I could barely keep up. Since I was testing the process, I only baked one loaf at a time, but each one disappeared quickly.
Whether you’re here to reduce food waste, stretch your baking creativity, or just try something new, I hope this post inspires you to give upcycled baking a try.

What Types of Bread Work Best for Upcycling?
When making upcycled bread at home, the key is using bread that’s stale, not moldy. Ideally, the loaf should be fully dried or a few days old so it blends easily into your dough without adding excess moisture. You can cube and toast the bread, let it air dry, or even dehydrate it to extend its shelf life before use.
Here are some types of bread that work particularly well for upcycling:
Country or artisan-style loaves – These tend to be heartier and full of flavor, especially sourdoughs. The tangy notes from sourdough deepen in flavor after drying and blend well into new dough.
Whole grain or seeded bread – Add extra texture, fiber, and flavor. Just be mindful of seeds that might interfere with the structure of your new dough (e.g., flax seeds absorbing moisture).
Day-old sandwich bread – A neutral option that adds softness and volume, especially when making softer sandwich loaves.
Stale baguettes – These dry out quickly and can be easily blitzed into crumbs or soaked for porridge-style additions.
Pane tipo ciabatta or focaccia – If they’re plain or simply seasoned, these high-hydration breads can add tenderness and complexity.
Avoid sweet bread with lots of sugar or inclusions (like raisins or chocolate) unless you’re intentionally baking a sweeter loaf.
I used several slices of Pane Incamiciato that I stored in a paper bag on the counter for about a week.
-

- Pane Incamiciato
-
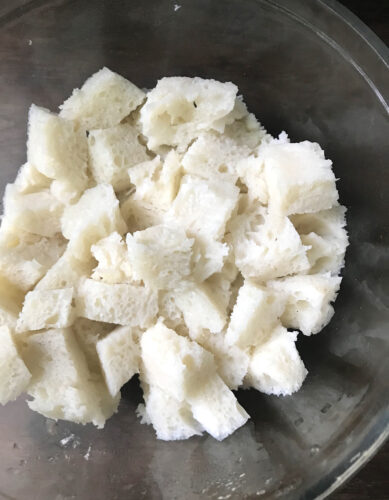
- Stale bread before soaking
Tips for Success When Baking with Upcycled Bread
Using old bread in new loaves might sound simple, but a few small tweaks can make a big difference in your results. Here are some tips to help you get the best bake every time:
Dry it out completely: Cube and toast the bread or leave it out to dry fully before using. This helps control hydration and prevents overly gummy dough.
Soak or blend: Depending on the recipe, you can either soak the dried bread in water/milk to make a porridge or blitz it into fine crumbs for mixing directly into the dough. Soaking is especially helpful for sandwich-style or softer loaves.
Start small: Replace about 10–20% of the flour weight with upcycled bread to begin. You can increase the amount as you get a feel for how it affects hydration, texture, and flavor.
Watch your hydration: Old bread will soak up moisture differently depending on how it was originally baked. You may need to adjust your water slightly.
Keep flavors in mind: A strong sourdough or seeded rye will add a lot of character. That can be great—or overpowering—depending on what you’re making. Match old bread types with your new dough accordingly.
Label your leftovers: If you bake often, keep a stash of dried bread cubes or crumbs in the freezer, labeled by type and date. It’s a great way to build your own upcycled pantry.
Avoid moldy bread: This one’s obvious but important—never use moldy bread. Stick with stale, dry, or frozen slices that are still safe to eat.
Baking with upcycled bread takes a little experimentation, but it’s a rewarding way to reduce waste and create something truly unique in the process.
-
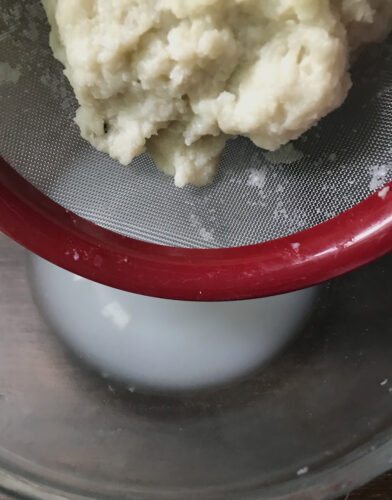
- Soak bread cubes overnight
-
- Squeeze out excess liquid
-
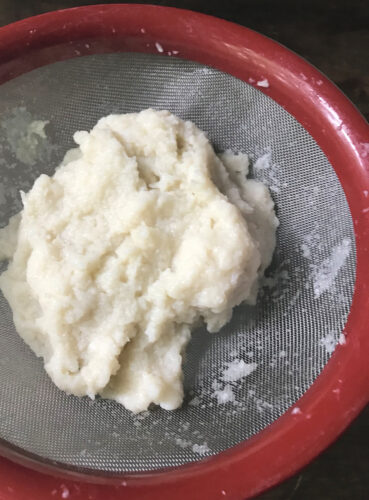
- Mixture becomes soft and smooth
-
- Bread cube mixture worked into the dough
Where to Buy Upcycled Bread (If You’d Rather Not Bake It)
If you love the idea of reducing food waste but don’t want to bake your bread, you’re in luck — several bakeries and food companies now offer upcycled breads made with surplus loaves:
Kroger’s Simple Truth Upcycled Bread: Contains 10% grain powder made from leftover brewing grains, offering a sustainable alternative to conventional bread.
Misfits Market Odds & Ends Bread: Uses ReGrained SuperGrain+®, a flagship upcycled ingredient, combined with sourdough for flavor and sustainability.
European Bakeries: Some bakeries in Europe use surplus bread to make new flour or sourdough starters, reducing ingredient needs and enhancing bread quality.
Café or bakery co-ops – Some local bakeries participate in food recovery programs and may sell loaves made using yesterday’s bread.
Farmers’ markets or food rescue organizations – Keep an eye out for vendors specializing in sustainable baking or surplus recovery.
As interest in circular food systems grows, more bakeries and brands are popping up with creative ways to reuse and reclaim ingredients that would otherwise be wasted.

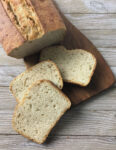
Making Upcycled Sourdough Sandwich Bread at Home
- Yield: 1 Loaf 1x
Description
Learn how to make upcycled sourdough sandwich bread at home using stale or surplus loaves.
Ingredients
100 grams stale bread (about 2 slices of sandwich bread)
200 grams milk, whole, scalded then cooled, additional milk for brushing
350 grams all-purpose flour, plus extra for sprinkling
50 grams white whole wheat flour
100 grams active and fed sourdough starter
1 1/2 tsp. Fine sea salt
2 Tbsp. Butter, softened
1 Tbsp. honey
Instructions
Equipment needed:
- Stand Mixer
- Small mixing bowl for soaking bread cubes
- Strainer for squeezing out excess liquid
- Two 9×5-inch metal loaf pans
Day One
Feed starter. The day before you plan to make the dough, feed your sourdough starter. Let it rest for 4-6 hours.
Note: I typically feed mine with 30 grams of sourdough, 65 grams of water, and 65 grams of flour. I’ve tested feeding my sourdough the night before and leaving it on the counter for longer than 6 hours, but it gets too acidic and the bread doesn’t rise very well. So, depending on my baking schedule, after 6 hours, I will place it in the refrigerator overnight so it’s ready for baking the next day. If you want to prepare the dough in the evening, feed your sourdough in the morning and it should be ready to go in late afternoon or early evening.
Soak bread cubes. The evening before you plan to make the bread, cut the bread into cubes and place them in a small bowl. Pour boiling water over the cubes. Cover and let the bread cubes soak overnight.
Day Two
The next day, squeeze out the excess liquid from the bread cubes until it becomes a smooth mixture.
Place the bread cube mixture in the bowl of a stand mixer and mix with the cooled milk. Add the flours and mix on low speed until thoroughly combined. Try not to incorporate any additional hydration or flour at this point.
Cover and let the flour mixture autolyze for 30 minutes.
Add the sourdough starter and mix on low speed until thoroughly incorporated throughout the dough. Cover and let the mixture rest for 30 minutes.
Sprinkle the salt over the dough. Mix thoroughly. Cover and let the dough rest for 10-15 minutes.
Mix in the butter and honey. Sprinkle in additional flour, one tablespoon at a time to form a workable dough. Don’t add too much flour. It should be a soft, but not too sticky dough. The dough will strengthen as it ferments.
Cover and let the dough ferment for 3-4 hours. Perform 2-3 stretch and fold sequences every 30 minutes for the first hour and a half. After the final stretch and fold, cover the dough and let it rest for an additional 1- 2 hours.
In the meantime, grease one 9×5-inch loaf pan with butter.
Shape the dough into a loaf and place it seam-side down in the prepared pan. Let the loaf proof for 1 hour at warm room temperature, then cover and place in the refrigerator to cold ferment overnight. Note: During the cold ferment, it helps to uncover the loaf for at least a few hours to develop a skin on top. This makes it easier to score.
Day Three
Remove the loaf from the refrigerator and allow it to rest on the counter at warm room temperature for 1- 1 ½ hours.
Meanwhile, preheat the oven to 400 degrees F. and position a rack in the lower third of the oven.
When the loaf is proofed, brush it with milk and score it straight down the middle using a bread lame. Brush with additional milk, if desired.
Carefully place the loaf in the preheated oven and invert the other (empty) loaf pan on top. Note: If you don’t have two metal loaf pans, you can bake the loaf without the pan on top; you just might not get as much oven spring.
Bake the loaf on the lower shelf, with the pan on top, for 25 minutes.
Remove the top pan, and move the shelf up to the middle rack. Rotate the loaf, and bake for an additional 20-25 minutes until the loaf is golden brown and the internal temperature is at least 195 degrees F.
Remove the pan to a wire rack. Let the loaf cool in the pan for 10 minutes. Remove the loaf and let it cool completely on the wire rack.
- Category: Sandwich Bread
- Method: Sourdough
Happy baking! See you in the kitchen!
Cathy
Leave a Reply