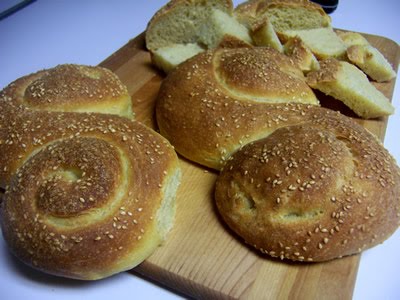
The #23rd bread in the BBA Challenge is Pane Siciliano, an Italian bread made with a mix of semolina flour and bread flour and formed into an S-shape and sprinkled with sesame seeds.
I loved making this bread! The dough felt so smooth and silky while I was kneading it. You don’t want to use a mixer for this one or you’ll miss out working with the wonderful dough! I also enjoyed shaping these loaves. The dough was so easy to work with, it just glided smoothly into shape.
I understand why this is one of Peter Reinhart’s favorite breads. This is a fabulous bread! It’s such a treat to work with the smooth dough and shape the beautiful loaves. The loaves are delicious! Absolutely delicious! I could’ve eaten a whole loaf by myself. Well, maybe not…
I like these loaves so much I’m submitting them to this week’s YeastSpotting bread roundup, hosted by Susan of Wild Yeast. Please visit Wild Yeast view all of the lovely breads in the roundup.
Here are some other Italian Breads you might like to try.
Pane Siciliano
Makes: 3 loaves
From The Bread Baker’s Apprentice by Peter Reinhart
Ingredients: *
- 3 cups Pâte Fermentée
- 1 3/4 cups / 219 grams unbleached high-gluten or bread flour
- 1 3/4 cups / 315 grams semolina flour (based on weight of 45 g per 1/4 cup Bob’s Red Mill semolina)
- 1 1/4 teaspoons / 8 grams fine salt
- 1 1/4 teaspoons / 6 grams instant yeast
- 2 tablespoons / 27 grams olive oil
- 1 tablespoon / 21 grams honey
- 1 1/4 to 1 1/2 cups / 296 -355 grams water, lukewarm
- Natural, brown, and/or black sesame seeds for topping
*I used this online calculator https://www.thecalculatorsite.com/cooking/cups-grams.php
Notes:
It took me about 5 days (rather than 3) from start to finish to make this bread. You only do a little bit each day so it worked out really well with my hectic schedule this past weekend.
I started the Pâte Fermentée Thursday night and let it stay in the refrigerator all weekend. Then I made the dough and shaped the loaves on Sunday. I put them in the refrigerator to rise overnight, took them out to rise on the counter for a few hours on Monday, then baked them (and ate them!)
Making the Pâte Fermentée
For detailed instructions on making the Pâte Fermentée, refer to the post on French Baguettes.
Making the Dough
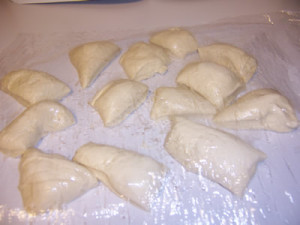
Remove the Pâte Fermentée from the refrigerator one hour before making the dough. Cut it into about 10 small pieces with a pastry scraper. Cover the dough with plastic wrap and let it sit on the counter for an hour to take off the chill.
Stir together the bread flour, semolina flour, salt and yeast. Add the Pâte Fermentée pieces, the oil, honey and water. Stir until everything comes together and makes a coarse ball.
I started out with a wooden spoon then switched to the Danish dough whisk to make sure the dough was thoroughly mixed. Adjust the flour or water if necessary so that the dough is neither too sticky nor too stiff.
Transfer the dough to a counter sprinkled with flour. Knead for about 10 minutes or until the dough is soft and pliable, tacky but not sticky, and all the pre-ferment is evenly incorporated. I love this dough! It feels wonderful!
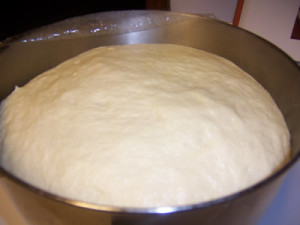
Fermenting the Dough
Form the dough into a ball. Lightly oil large bowl. Transfer the dough to the bowl and roll it around to coat it with oil. Cover the bowl with plastic wrap to begin the fermentation.
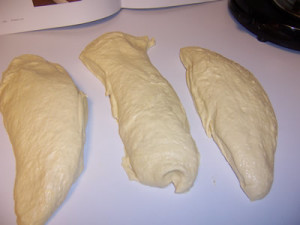
Transfer the dough to the counter and using a bench knife, gently divide it into 3 equal pieces.
Shape as for baguettes (page 74). For more details on shaping baguettes, refer to this post https://www.breadexperience.com/french-baguettes-bba-challenge/
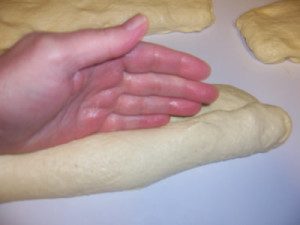
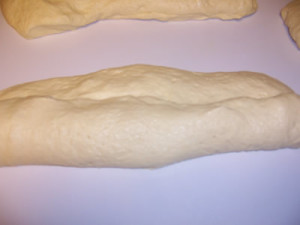
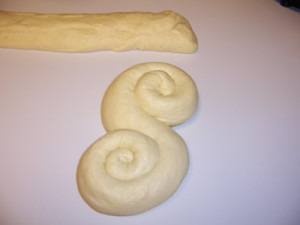
First form the dough into a batard shape. Gently pat the dough into a rough triangle. Then, being careful not to degas the dough, fold the bottom third of dough, letter style, up to the center and press to seal, creating surface tension on the outer edge.
Fold the remaining dough over the top and use the edge of your hand to seal the seam closed and to increase the surface tension all over.
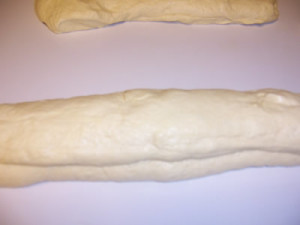
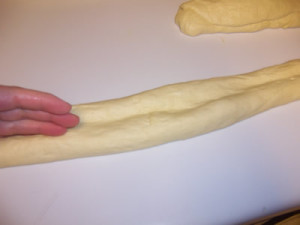
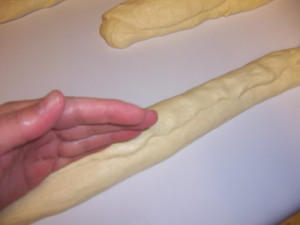
After the batards have rested, lift the dough and gently pull it out from the ends. This dough was so wonderful that the baguettes just slid right into form.
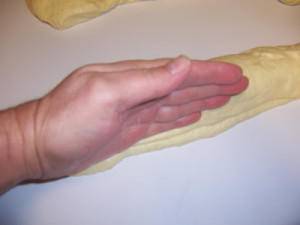
Crease the dough down the middle and fold it like a letter. Seal the crease against the counter to create surface tension.
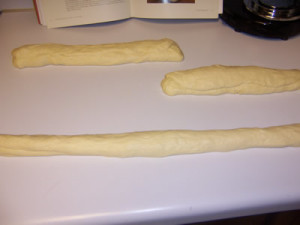
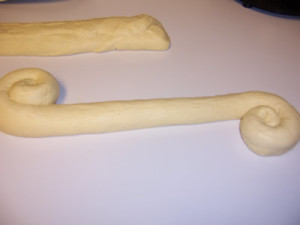
Working from the center of the loaf and moving to the outside edges, gently but firmly rock and roll out the dough to extend it to about 24 inches. Be careful not to degas it too much. Working from each end simultaneously, coil the dough toward the center, forming an S shape. I loved this part!
Now shape the other two loaves.
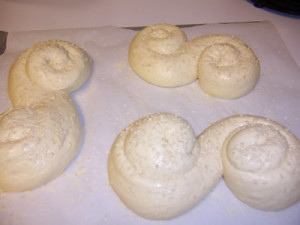
Place the loaves on a baking sheet lined with parchment paper sprinkled with semolina. I put all 3 loaves on the same baking sheet but you can bake them separately if you like. Mist the loaves with water. Then sprinkle sesame seeds on top of each loaf.
Spray the loaves with vegetable spray, cover them with plastic wrap or a food grade plastic bag, then place the pan in the refrigerator overnight.
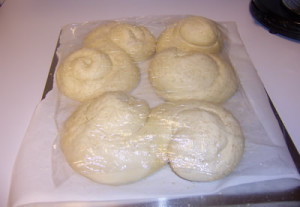
The next day, take the loaves out to finish proofing. I took them out a few hours before I planned to bake them to take the chill off.
To determine if the loaves need further proofing after you take them out of the refrigerator, gently poke the dough. This is fun!
If the dough springs back quickly, leave the pan out, still covered, for a couple of hours, or until it rises more. The dough should stay dimpled when poked, and the loaves should be nearly twice as large as when first shaped.
Preparing the Oven for Hearth Baking
Uncover the bread dough and place the pan in the oven. Bake the loaves for 30 minutes, rotating the loaves for even baking about halfway through the baking cycle. For detailed instructions on hearth baking, including using the steam pan and spraying the oven walls with water at 30-second intervals, refer to the post on Pain À l’Ancienne Baguettes.
If the loaves are touching, gently separate them. I had to remove the pan from the oven to separate them. Then I rotated the plan and placed it back in the oven to finish baking.
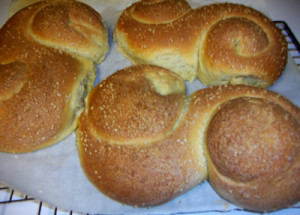
Continue baking for 10 to 15 minutes more until the loaves are a rich golden brown all over. If you see light or white sections of dough, extend the baking time for a few extra minutes to maximize color and flavor.
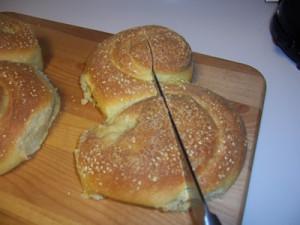
Remove the plan from the oven. Transfer the loaves to a cooling rack. Cool for at least 45 minutes before serving. Once the loaves had cooled, I decided to try Peter Reinhart’s suggestion for slicing this bread. I cut it lengthwise down the middle.
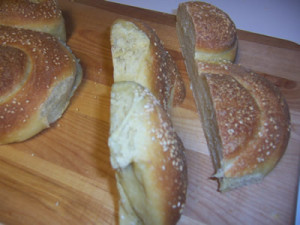
Then, I laid the cut side down on the cutting board and sliced it into 3/4-inch-thick slices across the width. You can do this either straight down or on a slight diagonal. I think I did a little of both.
See all of these slices! I ate them all – not at once but throughout the day! They were really good with butter and with pear butter and with citrus marmalade.
Here are the other two breads. I just love the way these loaves look!
I put the other loaves in a plastic bag to keep fresh for a couple of days if they last that long. One of the loaves will probably go in the freezer to enjoy another day.

Thanks for joining me this week in the Bread Baker’s Apprentice Challenge.
The next bread in Bread Baker’s Apprentice Challenge, is Pannetone. This bread uses a wild yeast starter. I have three starters so I’ll have to figure out which one I want to use.
Cathy
Cathy, that looks soooooo tasty. Your photo journey is wonderful!!
Thanks Chris! This bread is tasty. It’s definitely one of my favorites. I love the feel and taste of the semolina!
WOW..did this turn out gorgeous! It sure was worth the 3 days it took to make it…perfection!
Thanks Michelle! You’re right! This bread is definitely worth the time it takes to make it. I absolutely love it!
Wonderful!!
I love the shaping and the colour.
I haven’t gotten this far yet – I have the marble rye next. (I’m a bit of a meandering group of one!)
Thanks Natashya!
You’ll like this one! It’s a fun dough to work with and it’s easy to shape. Tastes wonderful as well! Just keep on plugging away and you’ll get there.
Happy Baking!
Cathy
Hi, Cathy.
Hey, great blog. I have made this bread a few times following Peter Reinhardt’s directions to the letter (type of flour, weighing everything, etc.). I have found that for me it helps to use a little bit less water than what his recipe calls for in the final dough. Curious to hear what your experience was like. Was your dough super sticky? No matter, this is always an outstanding and impressive bread and so tasty too! I am currently experimenting with changing a little bit the ratio of semolina and bread flour to use a bit more semolina (like a 50-50 mix).
Hi Monica, this is one of my favorite breads. I don’t remember having problems with this version being sticky. Not sure which bread flour I used so that could be the difference in terms of the absorption rate of the flour. I love semolina and I think a 50-50 mix works great in this bread. In fact, here is a version that uses a sponge of 50/50 semolina to bread flour https://www.breadexperience.com/semolina-bread-pane-siciliano-mellow/ Happy Baking!