
Learn how to shape 3 types of dinner rolls: Single Knot, Crescent, and Butterfly Rolls.
Rolls are very versatile and can be made into a variety of shapes to suit your fancy. I’ve made different types of rolls for Thanksgiving over the years, and this post features some of my favorite roll shapes.
The dinner rolls shown in the photos are made using Pumpkin Yeast Roll dough, but you could use any yeast roll recipe. Once you make the dough, just follow the steps below to shape the rolls into the desired shape.
The main thing to remember when shaping rolls is to have fun. Don’t let the dough intimidate you. It will work with you if you relax and just enjoy the process. Even if you don’t get the shape exactly right the first time (or the fifth time), the rolls will still be unique and taste good. My rolls never seem to last long enough for the recipient to complain about the shape.
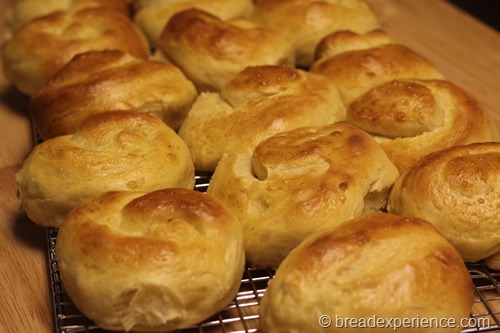
| After dividing the dough, roll each portion into a thick cylinder. | Cut each cylinder into eight equal pieces. |
![pumpkin-knot-yeast-rolls_1582_thumb[4]](https://www.breadexperience.com/wp-content/uploads/pumpkin-knot-yeast-rolls_1582_thumb-25255B4-25255D_thumb.jpg "pumpkin-knot-yeast-rolls_1582_thumb[4]") | ![pumpkin-knot-yeast-rolls_1583_thumb[4]](https://www.breadexperience.com/wp-content/uploads/pumpkin-knot-yeast-rolls_1583_thumb-25255B4-25255D_thumb.jpg "pumpkin-knot-yeast-rolls_1583_thumb[4]") |
| Round each piece by rotating your hand over it while gently pressing to form a sphere. | |
![pumpkin-knot-yeast-rolls_1584_thumb[4]](https://www.breadexperience.com/wp-content/uploads/pumpkin-knot-yeast-rolls_1584_thumb-25255B4-25255D_thumb.jpg "pumpkin-knot-yeast-rolls_1584_thumb[4]") | ![pumpkin-knot-yeast-rolls_1585_thumb[4]](https://www.breadexperience.com/wp-content/uploads/pumpkin-knot-yeast-rolls_1585_thumb-25255B4-25255D_thumb.jpg "pumpkin-knot-yeast-rolls_1585_thumb[4]") |
| Gently roll rounded dough piece into a 9-inch strand | Form strand into the shape of a “ 9” |
![pumpkin-knot-yeast-rolls_1586_thumb[5]](https://www.breadexperience.com/wp-content/uploads/pumpkin-knot-yeast-rolls_1586_thumb-25255B5-25255D_thumb.jpg "pumpkin-knot-yeast-rolls_1586_thumb[5]") | ![pumpkin-knot-yeast-rolls_1589_thumb[5]](https://www.breadexperience.com/wp-content/uploads/pumpkin-knot-yeast-rolls_1589_thumb-25255B5-25255D_thumb.jpg "pumpkin-knot-yeast-rolls_1589_thumb[5]") |
| Thread the long end of the “ 9 ” under and through the loop to form a knot | Place the knots 2 inches apart on a greased baking sheet |
![pumpkin-knot-yeast-rolls_1592_thumb[4]](https://www.breadexperience.com/wp-content/uploads/pumpkin-knot-yeast-rolls_1592_thumb-25255B4-25255D_thumb.jpg "pumpkin-knot-yeast-rolls_1592_thumb[4]") | ![pumpkin-knot-yeast-rolls_1598_thumb[5]](https://www.breadexperience.com/wp-content/uploads/pumpkin-knot-yeast-rolls_1598_thumb-25255B5-25255D_thumb.jpg "pumpkin-knot-yeast-rolls_1598_thumb[5]") |
Shaping Butterfly Rolls
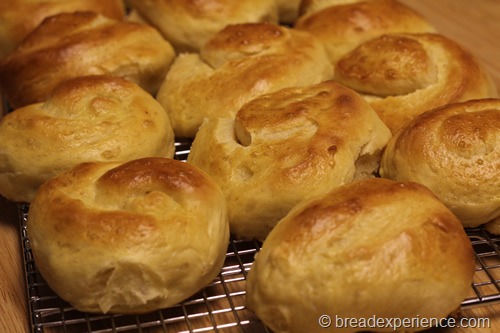
The Butterfly Rolls are in the front of this photo. Using a bigger spoon might help keep the indentation from closing up during the bake.
| Roll half of the dough into a 10-inch square. I shaped it into a 10-inch oval. | Brush the square with two teaspoons of melted butter or oil and roll up. |
![pumpkin-knot-yeast-rolls_1593_thumb[5]](https://www.breadexperience.com/wp-content/uploads/pumpkin-knot-yeast-rolls_1593_thumb-25255B5-25255D_thumb.jpg "pumpkin-knot-yeast-rolls_1593_thumb[5]") | ![pumpkin-knot-yeast-rolls_1594_thumb[4]](https://www.breadexperience.com/wp-content/uploads/pumpkin-knot-yeast-rolls_1594_thumb-25255B4-25255D_thumb.jpg "pumpkin-knot-yeast-rolls_1594_thumb[4]") |
| Place seam-side down. | Mark and cut into eight separate pieces. |
![pumpkin-knot-yeast-rolls_1595_thumb[4]](https://www.breadexperience.com/wp-content/uploads/pumpkin-knot-yeast-rolls_1595_thumb-25255B4-25255D_thumb.jpg "pumpkin-knot-yeast-rolls_1595_thumb[4]") | ![pumpkin-knot-yeast-rolls_1596_thumb[4]](https://www.breadexperience.com/wp-content/uploads/pumpkin-knot-yeast-rolls_1596_thumb-25255B4-25255D_thumb.jpg "pumpkin-knot-yeast-rolls_1596_thumb[4]") |
| Press each piece of dough firmly with the handle of a wooden spoon to form butterflies. | Place the butterfly rolls 2 inches apart on a greased baking sheet. |
![pumpkin-knot-yeast-rolls_1597_thumb[4]](https://www.breadexperience.com/wp-content/uploads/pumpkin-knot-yeast-rolls_1597_thumb-25255B4-25255D_thumb.jpg "pumpkin-knot-yeast-rolls_1597_thumb[4]") | ![pumpkin-knot-yeast-rolls_1600_thumb[6]](https://www.breadexperience.com/wp-content/uploads/pumpkin-knot-yeast-rolls_1600_thumb-25255B6-25255D_thumb.jpg "pumpkin-knot-yeast-rolls_1600_thumb[6]") |
Shaping Crescent Rolls
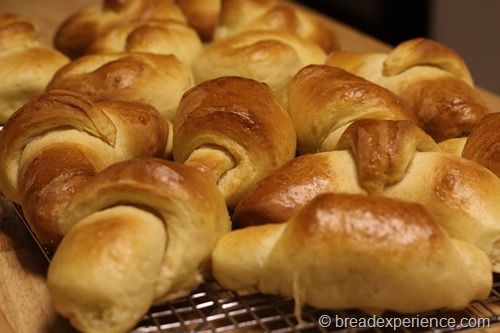
| Roll the dough portion into a 12-inch disk. | Cut it into eight wedges. |
![pumpkin-knot-yeast-rolls_1601_thumb[4]](https://www.breadexperience.com/wp-content/uploads/pumpkin-knot-yeast-rolls_1601_thumb-25255B4-25255D_thumb.jpg "pumpkin-knot-yeast-rolls_1601_thumb[4]") | ![pumpkin-knot-yeast-rolls_1602_thumb[4]](https://www.breadexperience.com/wp-content/uploads/pumpkin-knot-yeast-rolls_1602_thumb-25255B4-25255D_thumb.jpg "pumpkin-knot-yeast-rolls_1602_thumb[4]") |
| Brush the disk lightly with melted butter or oil, and roll up each section from the base of the wedge. | |
![pumpkin-knot-yeast-rolls_1605_thumb[4]](https://www.breadexperience.com/wp-content/uploads/pumpkin-knot-yeast-rolls_1605_thumb-25255B4-25255D_thumb.jpg "pumpkin-knot-yeast-rolls_1605_thumb[4]") | ![pumpkin-knot-yeast-rolls_1606_thumb[4]](https://www.breadexperience.com/wp-content/uploads/pumpkin-knot-yeast-rolls_1606_thumb-25255B4-25255D_thumb.jpg "pumpkin-knot-yeast-rolls_1606_thumb[4]") |
| Curve into crescents. | Place the crescent rolls 2 inches apart on a greased baking sheet. |
![pumpkin-knot-yeast-rolls_1608_thumb[4]](https://www.breadexperience.com/wp-content/uploads/pumpkin-knot-yeast-rolls_1608_thumb-25255B4-25255D_thumb.jpg "pumpkin-knot-yeast-rolls_1608_thumb[4]") | ![pumpkin-knot-yeast-rolls_1609_thumb[4]](https://www.breadexperience.com/wp-content/uploads/pumpkin-knot-yeast-rolls_1609_thumb-25255B4-25255D_thumb.jpg "pumpkin-knot-yeast-rolls_1609_thumb[4]") |
I hope you enjoy this tutorial on shaping rolls.
If you’re looking for the recipe for the rolls featured in this tutorial, click here.
For more Roll Recipes, click here.
Happy Baking!
Cathy
Leave a Reply