
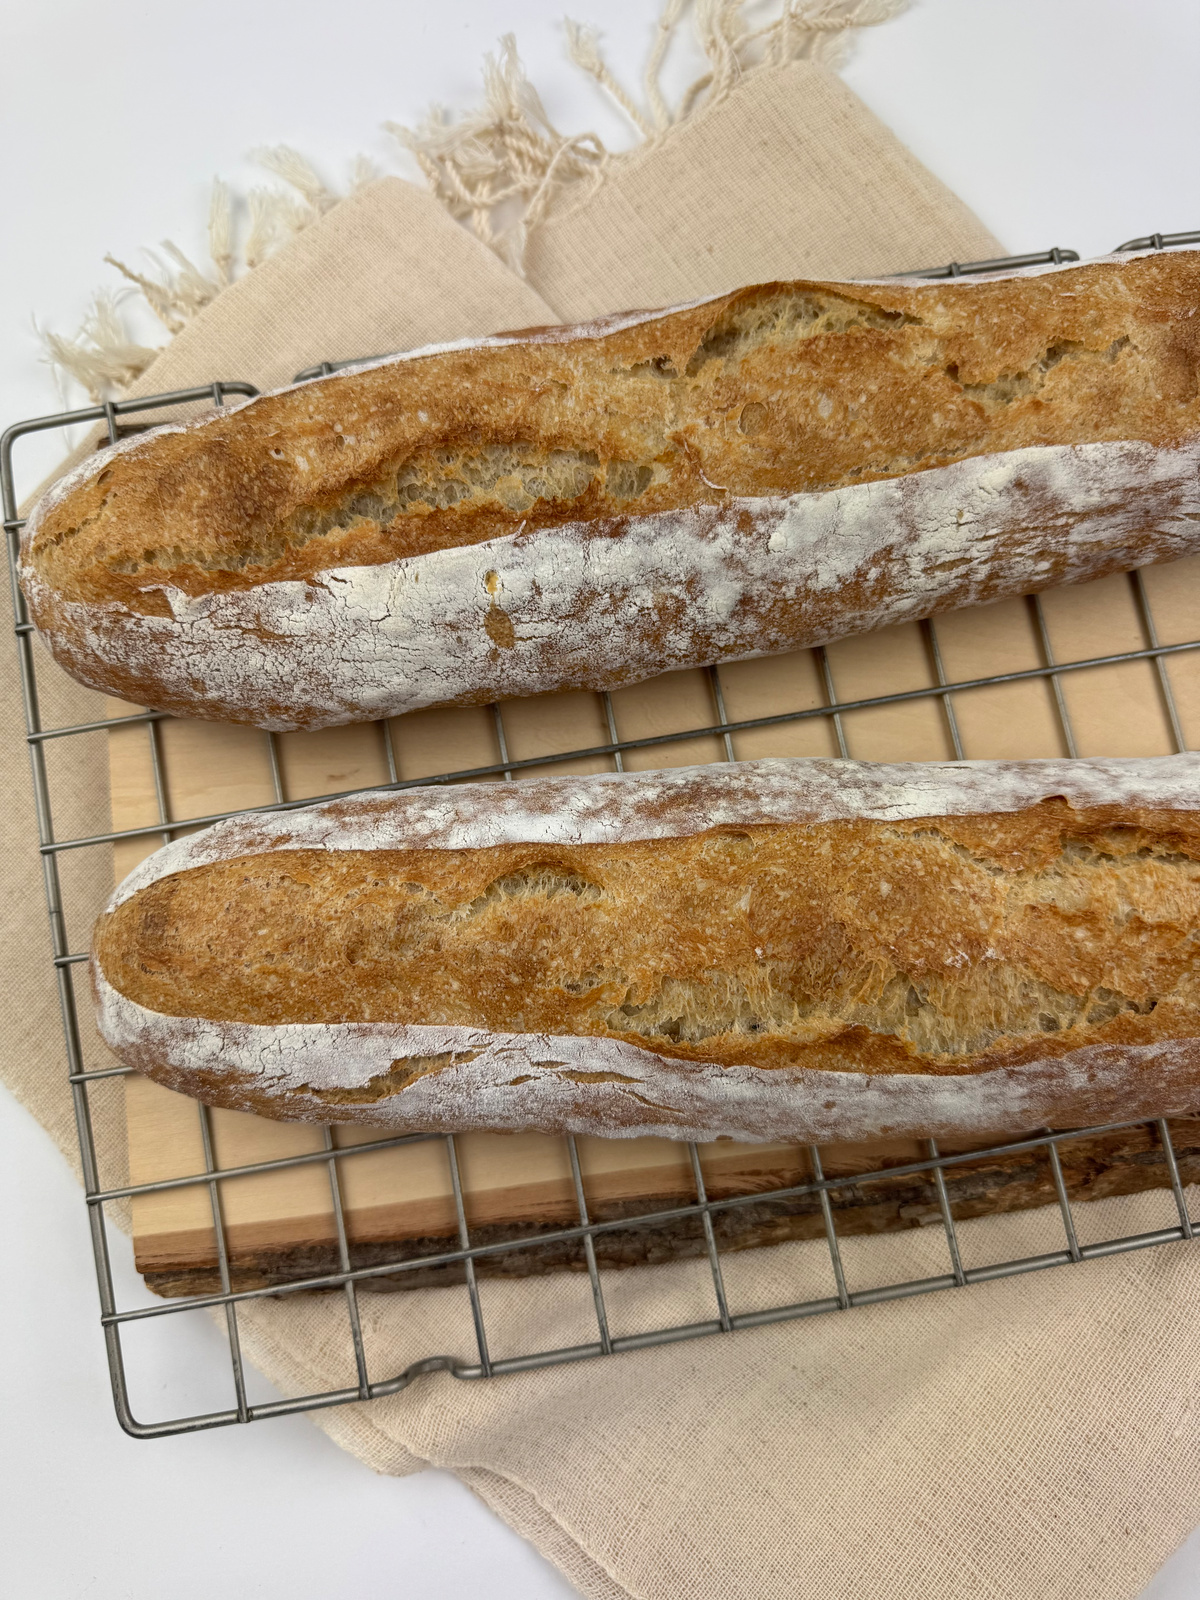
A good picnic baguette is built for sharing. It’s long, it tears clean, and it turns up at exactly the kind of meal that happens away from the kitchen table: a blanket in the grass, a folding chair by the pool, a paper plate balanced on your knee.

These are made with a simple overnight poolish, no sourdough starter required, and one recipe gives you three sizes that can be proofed in the same 15-inch baguette proofing baskets.
By the time the evenings turn warm here in the South, that’s most of how I want to eat. Fewer of the heavy weekend loaves, more of the bread that travels well and doesn’t ask much of the day.
This one starts the night before, not with a sourdough starter you have to keep alive, but with a poolish. It’s a loose overnight mix of flour, water, and a pinch of yeast that does the slow flavor work while you sleep. In the morning, you’ve got a dough ready to shape, and you didn’t have to feed anything to get there.
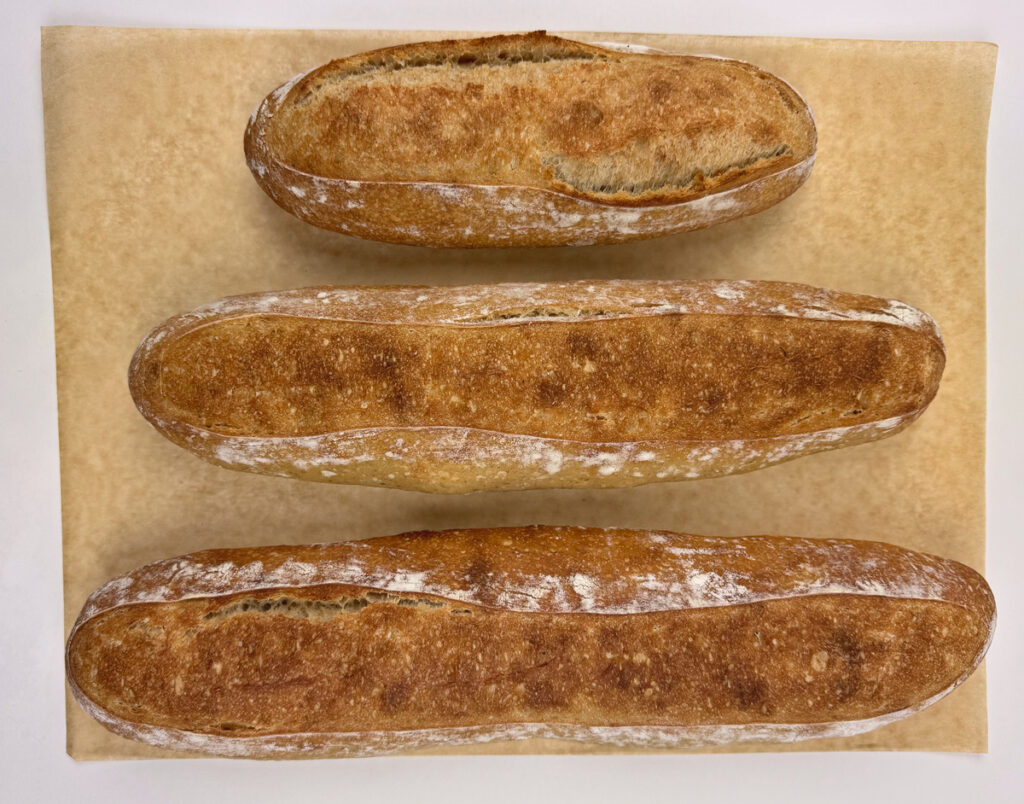
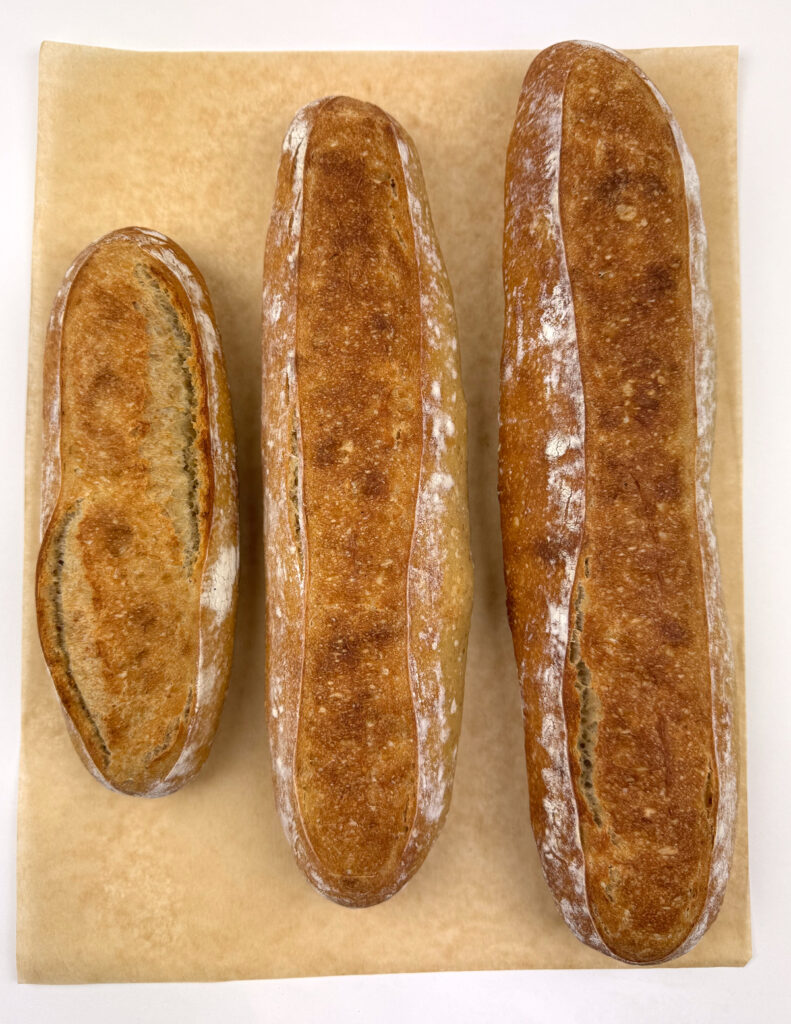
And because it’s one method, you can scale the loaf to the occasion. The dough weight decides the size. 300 grams proofs into a shorter, plumper loaf, about ten inches, right for two. 450 grams gives you a standard baguette, around fourteen or fifteen inches, for a few friends. And 550 grams makes the longest, most generous loaf, around fifteen and a half inches, the one to bring when the whole group is coming. You’re not learning three recipes. You’re just deciding how much dough to use.
Why a poolish
You don’t need a sourdough starter to bake a beautiful baguette. You need about five minutes the night before and a pinch of yeast.
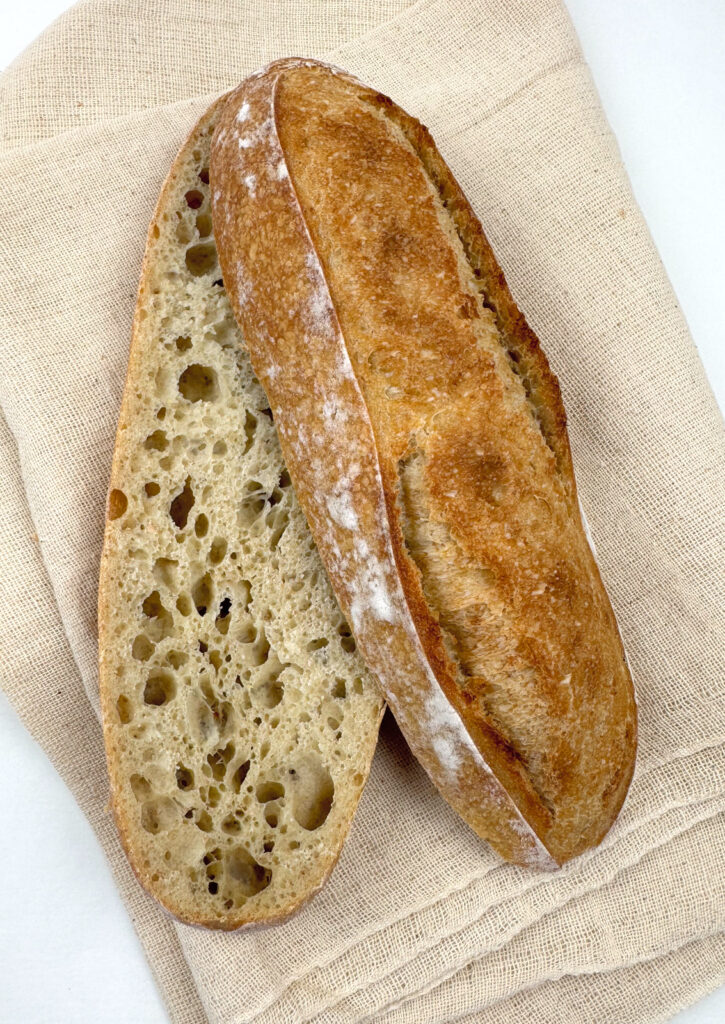
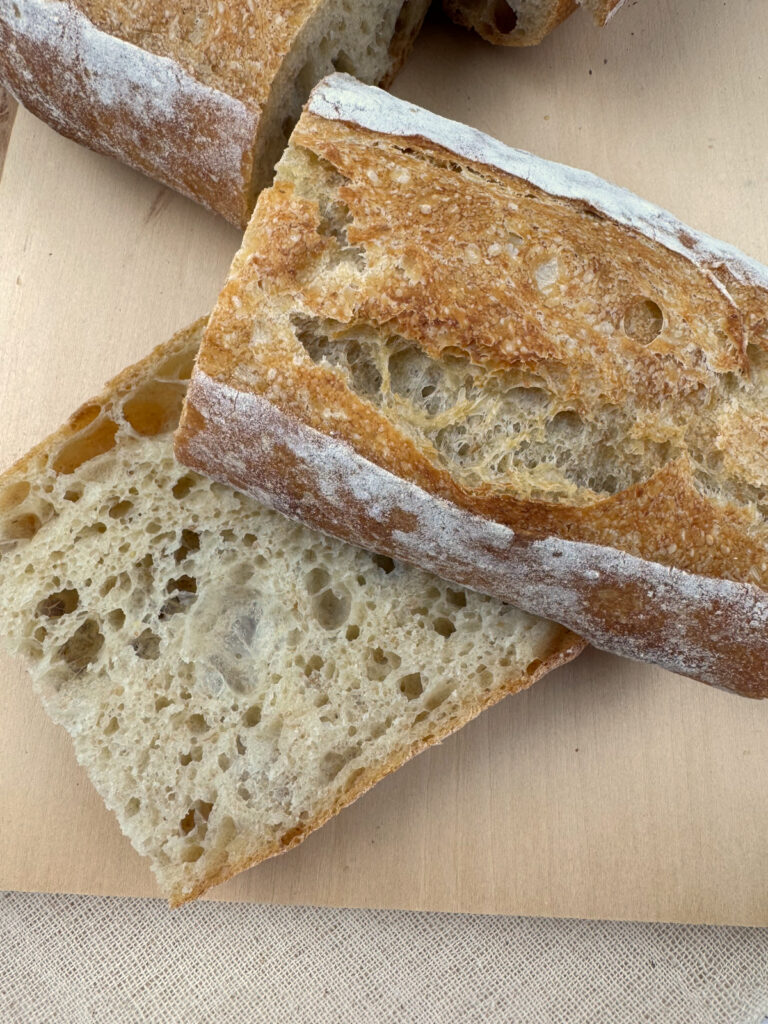
That overnight mix is the poolish, and it’s the quiet workhorse of this recipe. Flour, water, and just enough yeast to get things going, left to ferment at room temperature while you sleep. By morning, it’s bubbly, loose, and faintly tangy, and it’s already done the work that makes a baguette worth baking: deeper flavor than a same-day dough, a more open crumb, a crust that crackles, and a loaf that keeps better the next day.
I keep a sourdough starter (my favorite one goes back to 2011), and I love what it gives a loaf. But not every bake needs it, and plenty of good bakers don’t keep one. A poolish gets you most of the way there with none of the upkeep. It’s the method I reach for when I want a dependable, beautiful baguette without planning my week around feedings, and it’s the one I’d point any baker to first.
Plan your timing
A poolish baguette is an overnight project no matter what, but you have a choice about which overnight. Two paths work.
Same day
Build the poolish at night, then mix, shape, proof, and bake the next day. This is the quicker route, and it makes a lovely loaf.
Two overnights (my preference for picnics)
Build the poolish the first night. The next day, mix the dough, shape it, and set the loaves in the baskets. Then, instead of proofing and baking, cover the baskets and let them cold ferment in the fridge overnight. Bake the following morning. The cold ferment deepens the flavor and, more to the point, it means the bread comes out of the oven the same day you eat it.
Here’s how that looks for a Sunday picnic. Friday night, mix the poolish. Saturday, build and shape the dough and tuck the baskets into the fridge. Sunday morning, bake. You walk out the door with baguettes still warm enough to fog the linen.
The night before: build the poolish
Building a poolish takes about five minutes. In a jar or bowl big enough to let it roughly double, whisk together the spelt flour and water with a pinch of instant yeast until smooth, with no dry flour left. Cover loosely and leave it on the counter for 12 to 14 hours.
By morning, it should be bubbly across the surface, domed on top, and just beginning to flatten in the center, with a faint sour-sweet smell. That settling in the middle is the signal it’s ready. If it still looks tight and flat, give it another hour. A cool kitchen slows it down; a warm one speeds it up.
The next morning: mix and bulk ferment
Combine the all-purpose flour with the water and the poolish. Mix until no dry flour remains, then cover and rest for 30 minutes. This rest, the autolyse, does some of the kneading for you by letting the flour hydrate fully before you work it.
Sprinkle the salt and the instant yeast over the dough and mix them in by squeezing and folding until fully incorporated. If the salt needs a little more moisture to dissolve, add a splash of the reserved water.
Now bulk ferment at room temperature for two to three hours. For the first hour and a half, give the dough a set of stretch-and-folds every 30 minutes, three sets in all: reach under one side, stretch it up, and fold it over the top, turning the bowl and repeating until you’ve gone all the way around. With each set, the dough will feel less sticky and more elastic. It’s ready to divide when it’s smooth, slightly puffy, and shows good gluten development.
Dividing by weight: your three size options
This is where the recipe earns its flexibility. It’s built around two 450-gram baguettes, the default. The same batch, about 885 grams of dough at 75% hydration, also divides three ways depending on your day: two 450-gram baguettes, three small 300-gram loaves, or one generous 550-gram loaf with a 300-gram loaf alongside.
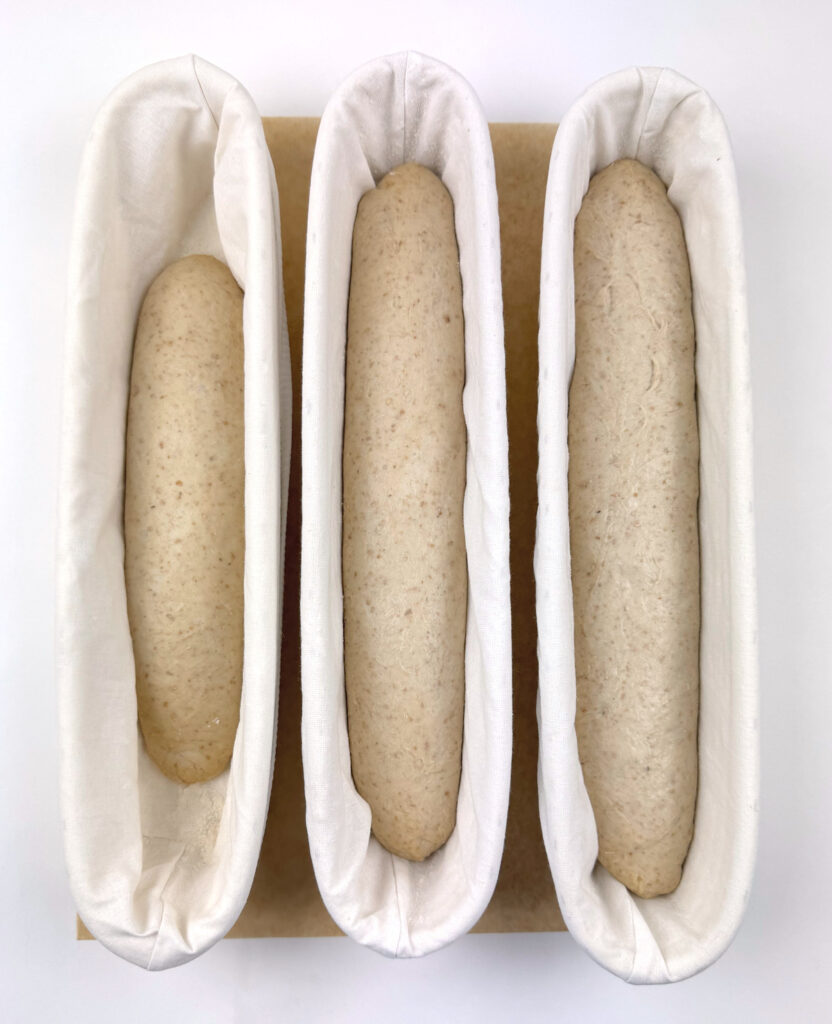
All of them proof in the same 15-inch baguette proofing baskets; the dough weight, not the basket, is what sets the final size. Treat the loaf weights as targets rather than rules.
Want a different mix, or two larger loaves? The recipe card shows how to scale by flour weight.
Shaping and proofing
Turn the dough out onto a lightly floured surface and weigh out your pieces. Preshape each into a rough log, then rest them covered for 20 minutes so the gluten relaxes before the final shaping.
Each size is shaped a little differently to suit how you’ll use it.
If you’re making the default two 450-gram loaves, follow the 450-gram shaping below; the 300-gram and 550-gram notes are there for whichever sizes you divided into.
The 300g loaf (sandwich-style)
Shape to roughly 10 to 12 inches, noticeably thicker than a thin baton. Start from a tighter, rounder preshape. Letter-fold and seal, then roll just enough to close the seam and give a slight taper at the ends. You’re after an oval-ish baton, not a long thin demi. Set it in the 15-inch basket, centered, with empty space at each end.
The 450g loaf (classic baguette)
Shape to fill the 15-inch basket. Pat the dough into a rectangle, fold the top third down and seal, fold the bottom third up and seal, then roll it into a long, even taper.
The 550g loaf (generous loaf)
Same technique as the 450, shaped to fill the basket, but the loaf will be visibly fuller through the middle.
A note on length: How long your loaf finishes depends partly on how you handle the dough. The 550-gram loaf bakes to about fifteen and a half inches, but there’s no need to stretch it any further. If you’re baking on a stone or a sheet, an over-stretched loaf can run right off the edge. Shape to fit your oven, not past it.
No basket? A floured couche, or a linen towel folded into channels to support each loaf, works too. The shape will be a little less defined, but the bread will be just as good.
Set each shaped loaf seam-side up in a well-floured basket and cover it. Now the two paths split. If you’re baking the same day, proof at room temperature for 45 minutes to an hour, until the dough springs back slowly when gently pressed, then bake. If you’re using the overnight cold ferment, cover the baskets well and move them straight to the fridge; you’ll bake from cold the next morning.
Scoring and baking
Whether your loaves proofed on the counter or came straight from an overnight in the fridge, they bake the same way. Preheat the oven to 475°F (245°C) with a baking stone or steel inside and a steam setup ready, and give it a full 45 minutes to come up to temperature. A properly hot stone is most of what gives a baguette its spring.
The simplest setup is one stone on the middle shelf with a cast iron pan on the rack below it, or on the oven floor if there’s no lower rack.
Turn each loaf out onto parchment or a transfer board. Score it with one long, shallow slash straight down the center, blade held at a low angle. (A classic baguette gets three to five overlapping diagonal slashes, but for these I like the single clean line.)
Slide the loaf onto the hot stone, pour a cup of hot water into the preheated cast iron pan, and shut the door quickly to trap the steam. Bake 22 to 26 minutes, until the crust is deeply golden and the internal temperature reads 205 to 210°F (96 to 99°C). The 300-gram loaf bakes faster than the larger two, so start checking it around 18 to 20 minutes. Bake the bigger loaves together if your stone fits both, or stagger them.
If your oven has the shelves for it, here’s how I bake mine for a little more control over the crust. I set a baking steel on a lower shelf with the cast iron pan beneath it, and a baking stone on an upper shelf. The loaf bakes on the lower steel for 10 to 12 minutes, then I rotate it and move it up to the top stone for another 10 minutes. If it needs more color, I rotate once more for 3 to 5 minutes.
Cool the loaves on a wire rack for at least 30 minutes before slicing. As tempting as a warm baguette is, the crumb is still setting, and cutting too early leaves it gummy.
Make-ahead and packing for the picnic
Picnic Baguettes are at their best the day they’re baked, which is the whole reason for the two-overnight rhythm: you bake the morning of and walk out the door with fresh bread.
If you do bake the day before, let the loaves cool completely, then store them in a breathable bread bag or wrapped in linen rather than plastic, which softens the crust.
To travel, wrap the whole loaf in a clean towel and slice it once you arrive so it doesn’t dry at the cut edges. A day-old baguette is still excellent for sandwiches, or revived with a few minutes in a hot oven.
Serving suggestions
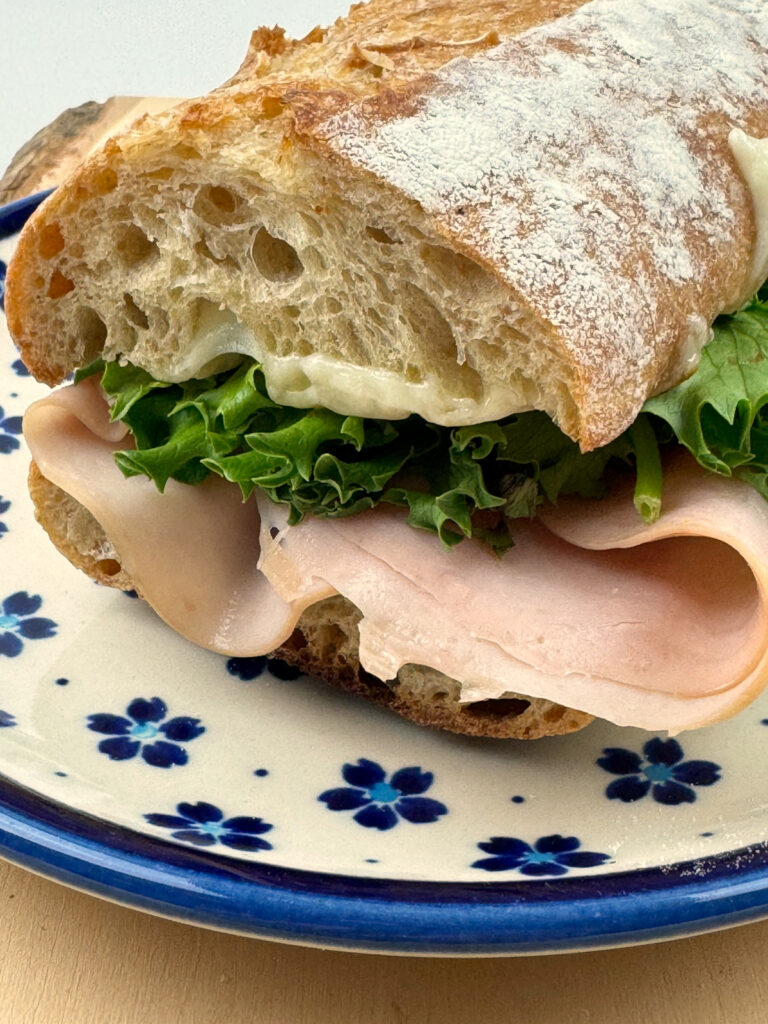
Keep it simple and let the bread lead. Cultured butter and radishes. Ham and gruyere. Ripe tomato with good olive oil and flaky salt. Torn alongside cheese and stone fruit. A picnic baguette doesn’t need much help.
You might enjoy these other baguette-style bread ideas for a picnic
Print
Picnic Baguettes: Easy Poolish Recipe in Three Sizes
- Yield: 885g of dough at 75% hydration 1x
Description
Crusty homemade baguettes made with a simple overnight poolish, no sourdough starter required. One dough makes three sizes, all proofed in the same 15-inch basket; you can bake for two, a few, or a whole picnic crowd.
Yield: about 885g of dough at 75% hydration. Built around two 450g baguettes (the default), but you can divide it into three 300g loaves, or one 550g loaf with a 300g loaf alongside. Treat the weights as targets, not rules.
Ingredients
Poolish:
50g whole grain spelt flour
50g water, room temperature
Pinch of instant yeast
Final dough:
450g all-purpose flour
325g water, room temperature (75% hydration)
All of the poolish
10g fine sea salt
1/8 tsp instant yeast
Instructions
The night before: Poolish
Whisk together the poolish ingredients until smooth in a jar or bowl with room to roughly double. Cover loosely and rest at room temperature for 12 to 14 hours, until bubbly, domed on top, and just beginning to flatten in the center.
The next morning: Final dough
- Combine the flour with the water and the poolish. Mix until no dry flour remains. Cover and rest 30 minutes (autolyse).
- Sprinkle the salt and yeast over the dough. Mix in by squeezing and folding until fully incorporated, adding a splash of water if needed to dissolve the salt.
- Bulk ferment at room temperature 2.5 to 3 hours. Stretch and fold every 30 minutes for the first 1.5 hours (3 sets total). The dough is ready when smooth, slightly puffy, and well developed.
- Divide by weight (300g, 450g, and/or 550g). Preshape each piece into a rough log and rest, covered, 20 minutes.
- Shape to suit each size and set seam-side up in a well-floured 15-inch basket. 300g: a thicker 10 to 12 inch baton, centered with space at the ends. 450g and 550g: pat to a rectangle, letter-fold, seal, and roll into a long taper to fill the basket.
- Final proof. Same day: cover and proof at room temperature 45 minutes to 1 hour, until the dough springs back slowly when pressed. Overnight: cover well and refrigerate; bake straight from the fridge the next morning.
- Preheat to 475°F (245°C) for 45 minutes with a stone or steel and a cast iron steam pan below it.
- Turn out, score with one long shallow slash down the center, slide onto the stone, and add a cup of hot water to the steam pan.
- Bake 22 to 26 minutes, until deeply golden and 205 to 210°F (96 to 99°C) internal. Check the 300g loaf around 18 to 20 minutes.
- Cool on a wire rack at least 30 minutes before slicing.
Notes
This recipe is written by weight for accuracy. A simple kitchen scale makes baguettes far more repeatable, and it is the single most useful tool for bread.
Want a different mix, or larger loaves? Scale by flour weight. Use about 170g flour for each 300g loaf, 255g for each 450g loaf, or 315g for each 550g loaf. Add up the loaves you want, then use water at 75% of the total flour and salt at 2%. Example: two 550g loaves need about 630g flour, 470g water, and 13g salt.
- Category: Baguettes
- Method: Poolish
- Cuisine: French
Happy Baking,
Cathy
Leave a Reply