For Day 7 of the Bread Baker’s Apprentice Challenge, we made Ciabatta. Ciabatta is an Italian bread made in the shape of a slipper.
The bread baker’s challenge just keeps getting better and better. I’ve enjoyed making every bread in the challenge. However, I think Ciabatta is my favorite so far. I love this bread. My taste tester said “Those Italians know what they’re doing, don’t they?” I felt like a real Artisan baker making this bread. And the results…delicious! I’m hooked! It’s so chewy and wonderful – even at room temperature with just olive oil.
According to Peter Reinhart, “This bread hails from an age-old tradition of rustic, slackdough breads, however, the name ciabatta was not applied to the loaf until the mid-twentieth century by an enterprising baker in the Lake Como region of northern Italy. He observed that the bread resembled a slipper worn by dancers of the region and thus dubbed his loaf ciabatta di Como (slipper bread of the Como).” I love dance and Italian bread so I was really excited about making this bread.
The book presents several different methods for making this bread: Ciabatta, Poolish Version; Ciabatta, Biga Version; Wild Mushroom Ciabatta (Ciabatta al Funghi); Ciabatta with Cheese (Ciabatta al Formaggio); or Caramelized Onion and Herb Ciabatta. I decided to make the poolish version. Next time I’ll try the biga version.
Updated 7/11/09:
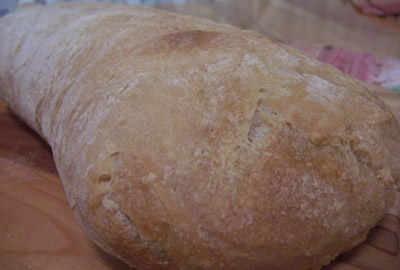
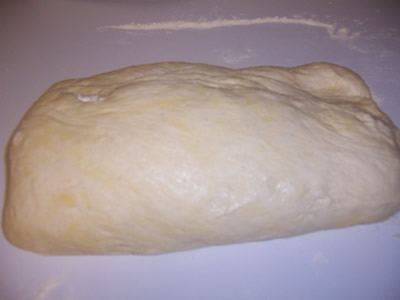
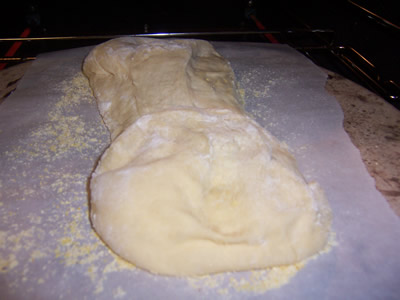
Ciabatta: Take Two
Here is my second try at Ciabatta. I think this one looks much better.
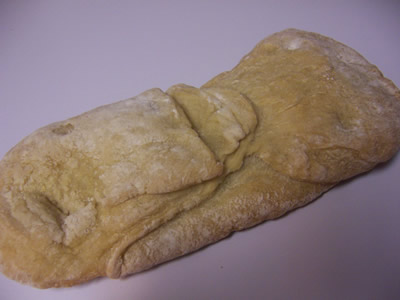
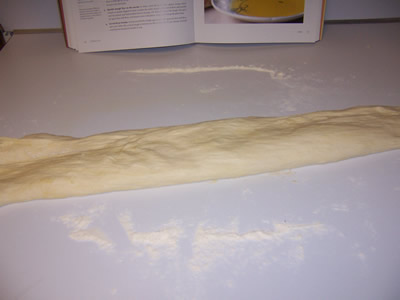
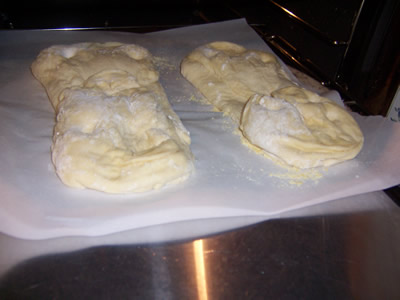
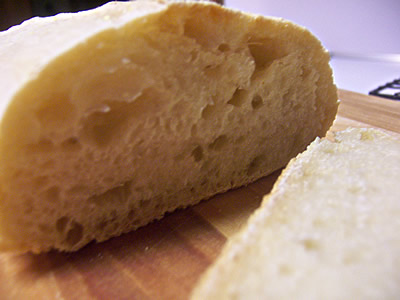
Ciabatta: First Try
This one kind of looks like an old shoe rather than a slipper.
Ciabatta, Poolish Version
Making the Poolish
- 2 1/2 cups (11.25 ounces) unbleached bread flour
- 1 1/2 cups (12 ounces) water, at room temperature
- 1/4 teaspoon (.03 ounce) instant yeast
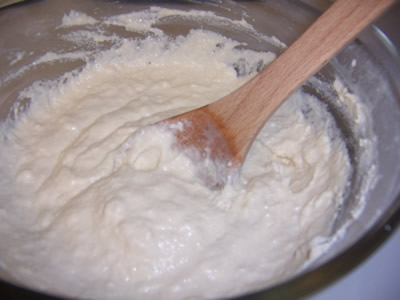
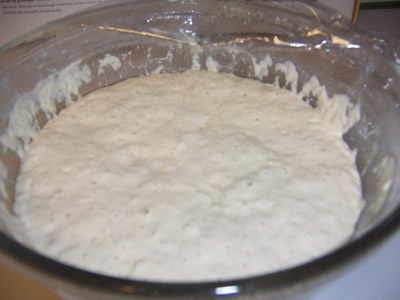
Stir together the flour, water, and yeast. The dough should be soft and sticky and look like pancake batter.
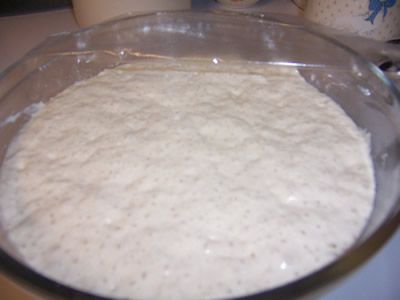
Cover the bowl with plastic wrap and ferment at room temperature for 3 to 4 hours, or until the sponge becomes bubbly and foamy. Refrigerate it immediately. It will keep for up to 3 days in the refrigerator. I made the poolish on Wednesday night and put in the refrigerator for 2 days to give it an overnight retarding and to fit it in my schedule.
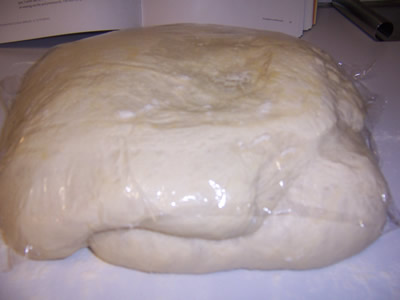
This is the poolish after sitting on the counter for 4 hours. Now it’s ready to go in the fridge.
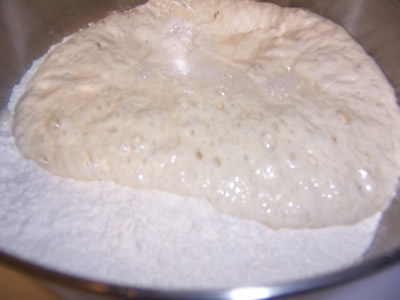
I removed the dough from the refrigerator Friday afternoon to take the chill off so I could bake the bread Friday night. That worked out really well!
The dough after sitting on the counter for an hour to get the chill off.
Making the dough
- 3 1/4 cups (22.75 ounces) poolish
- 3 cups (13.5 ounces) unbleached bread flour
- 1 3/4 teaspoons (.44 ounce) salt
- 1 1/2 teaspoons (.17 ounce) instant yeast
- 6 tablespoons to 3/4 cup (3 to 6 ounces) water, lukewarm
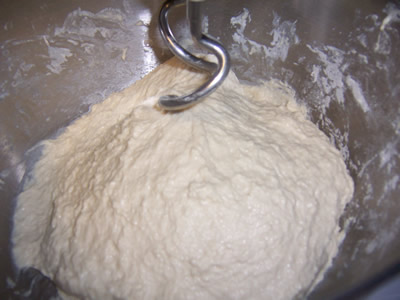
Stir together the flour, salt, and yeast in a 4-quart mixing bowl. Add the poolish and 6 tablespoons of the water. Then mix on low speed of the mixer until the ingredients form a sticky ball.
Add additional water as needed and continue to mix. Mix on medium speed for 5 to 7 minutes or until you have a smooth, sticky dough.
Then switch to the dough hook for the final 2 minutes of mixing. The dough should clear the sides of the bowl, but will stick to the bottom of the bowl. Add additional flour if necessary to firm up the dough to clear the sides of the bowl, but it should still be soft and sticky.
First Rise:
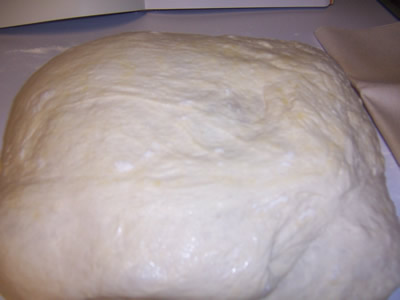
Make a bed of flour about 8 inches square on the counter. Use a bowl scraper or spatula dipped in water to transfer the sticky dough to the bed of flour on the counter.
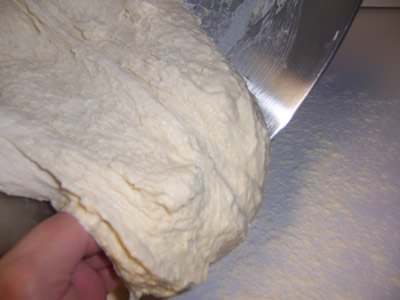
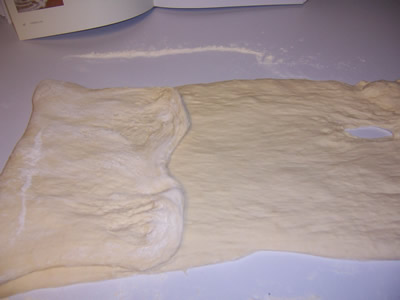
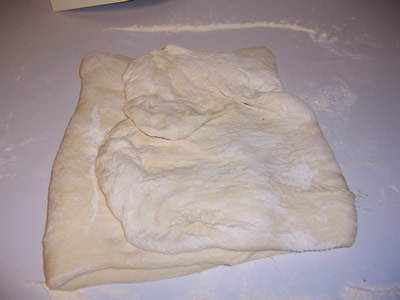
Stretch and fold the dough as show below or View a video of the stretch and fold method

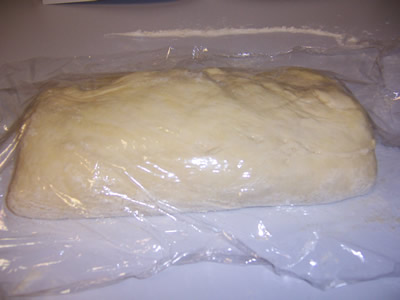
Mist the top of the dough with spray oil, again dust with flour, and loosely cover with plastic wrap and let it rest for 30 minutes.
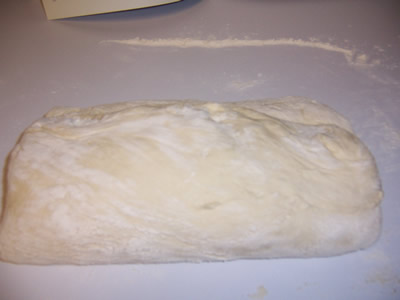
Then stretch and fold the dough again. Mist with spray oil, dust with flour, and cover.

Allow the covered dough to ferment on the counter for 1 1/2 to 2 hours. It will swell, but not necessarily double in size. I ended up leaving my dough to ferment for about 2 1/2 to 3 hours while I was shopping. I was surprised (and happy) that it didn’t swell too much.
Shaping the Loaves
Set up a couche. This part was fun! I used a thick pastry cloth dusted with flour.
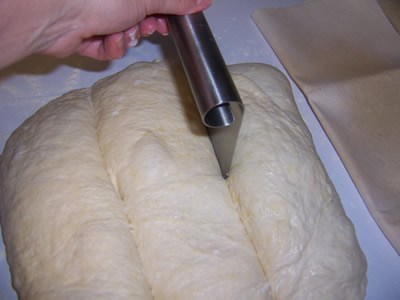
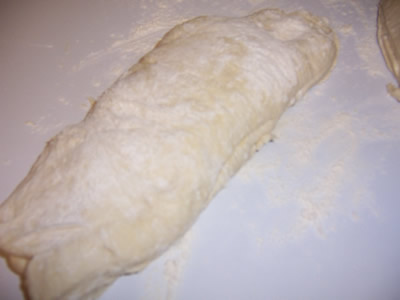
Remove the plastic from the dough and shape the loaves as shown below. (Refer to page 138)
Carefully cut the dough into 2 or 3 pieces trying not to degas it.
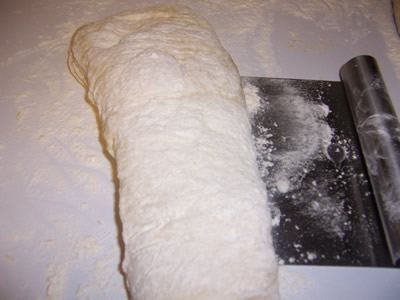
Separate the pieces.
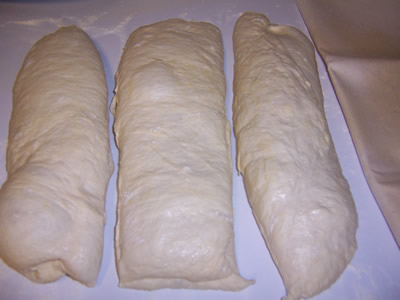
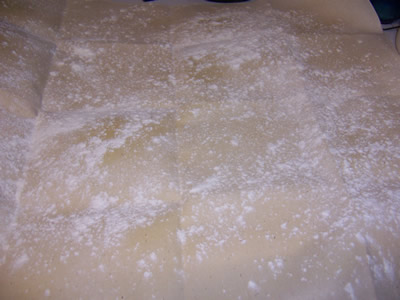
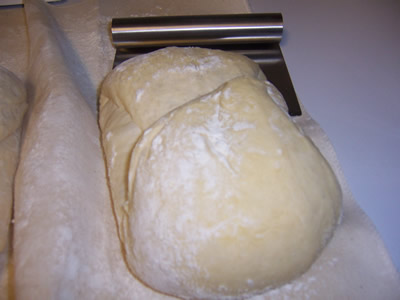
Sprinkle the dough pieces with flour. Carefully lift these pieces using a dough scraper if necessary.
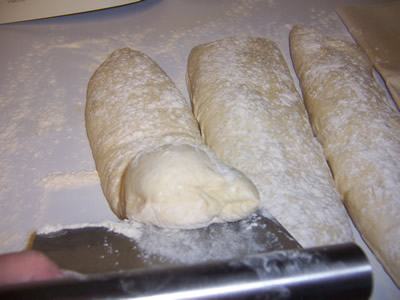
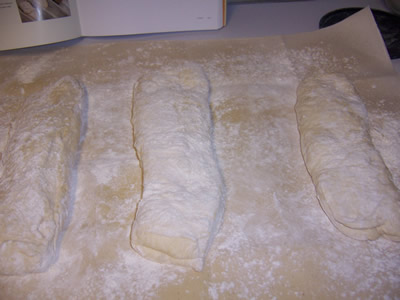
One more to go…
Lift the dough carefully
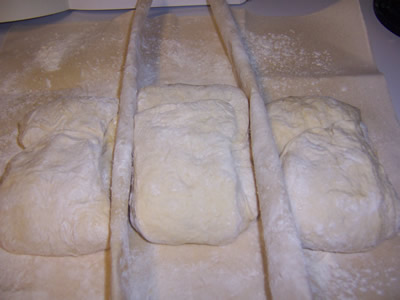
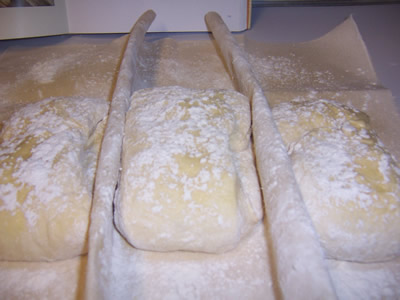
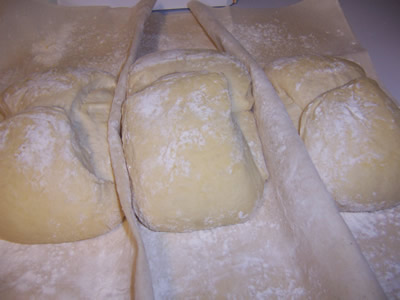
Place the loaves on the couche and leave enough room to bring up the folds.
Bring up the folds on the couche to help the loaves keep their shape.
Spritz the loaves with cooking spray. Dust the loaves with flour.
Cover the loaves with a towel. Then proof the loaves for 45 to 60 minutes at room temperature, or until the dough has swelled a bunch.
Preparing the oven for hearth baking
Here is a video on how to prepare your oven for hearth baking
Place a baking stone on the bottom rack of the oven. Then place an empty steam pan on the middle rack. Preheat the oven to 500 degrees F.
Baking the Bread
Generously dust a peel or the back of a sheet pan with semolina flour or cornmeal and very gently transfer the dough pieces to the peel or pan. Use a pastry scraper if you need support.
Lift the dough from each end and tug the dough out to a length of 9 to 12 inches. If the dough bulges too high in the middle, you can dimple it down with your fingertips to even out the height of the loaf. This part was fun! Sorry I couldn’t take a photo and stretch the dough at the same time. You’ll have to try it for yourself.
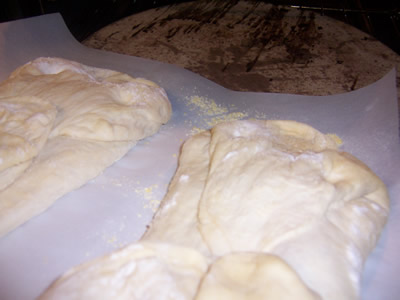
Slide the 2 doughs onto the baking stone.
Pour 1 cup hot water into the steam pan and close the door. After 30 seconds, open the door, spray the side walls of the oven with water, and close the door. Repeat twice more at 30-second intervals. After the final spray, turn the oven setting down to 450 degrees F and bake for 10 minutes.
Rotate the loaves 180 degrees for even baking and continue baking for 5 to 10 minutes longer, or until done. The bread should be golden in color. The loaves will feel hard and crusty but will soften as they cool.
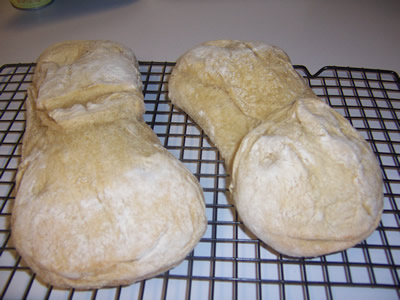
Cooling the bread
Transfer the bread to a cooling rack and allow it to cool for at least 45 minutes before slicing or serving.
Eating the bread
I made this bread several days ago and although it’s a lean bread, it still tastes pretty good with olive oil and seasonings. Yummy!
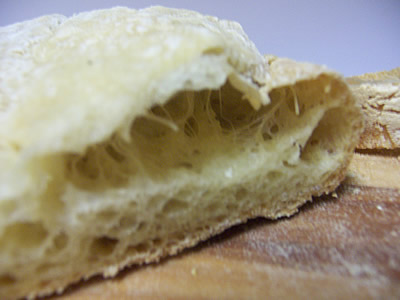
Updated 7/11/09: Ciabatta Take Two:
The holes aren’t quite as big on this loaf, but it rose better than the first try.
Thanks for joining us this week in the Bread Baker’s Apprentice Challenge. Stay tuned for Day 8 of the Bread Baker’s Apprentice Challenge:
Next time, we’ll be making cinnamon rolls. I don’t know about you, but my family is waiting with baited breath for this one!
Happy Baking!
Cathy
susies1955 says
Wow, your ciabattas look great. Love all the photos.
Love the crumb holes too.
Great baking along with you.
Susie
Cathy (breadexperience) says
Thanks Susie! Thanks for following along. I appreciate the support. I don’t know how you keep up with everyone!
strangerkiss says
This is such an excellent step-by-step description of making the Ciabatta. I finished my Casatiello and Challah last weekend and now feel pretty caught up with the challenge. I’ll be tackling the Ciabatta this week and your write-up will be invaluable. Thanks so much!
My write up for the Casatiello and Challah is here: http://strangerkiss.wordpress.com/2009/06/28/casatiello-and-challah/
Cathy (breadexperience) says
Thanks strangerkiss. I’m glad you’re following along with us. It’s a lot of fun! I’ll definitely check out your posts on Casatiello and Challah. I’m learning so much from everyone.
Anonymous says
I thought ciabatta called for more water than this recipe? is there a typo?
Cathy W. says
This particular ciabatta is made with a poolish of 107% (12 ounces) water to 100% (11.25 ounces) bread flour and 6 tablespoons to 3/4 cup additional water in the dough. It’s a fairly wet dough, but feel free to add more water if you prefer working with an even wetter dough. Just make sure the dough holds together enough to do the stretch-and-folds to develop the gluten.
The Smoking Gun! says
I’m thinking he just scanned the page for the Ciabatta “dough recipe” and skipped the poolish, possibly thinking it was for something else, or an optional step or just ignored it for not being what he was looking for, a Ciabatta dough recipe.
When I read it initially I was beginning to panic over working with such poofy slop, until I was able to breathe a sigh of relief upon seeing how little water compared to flour went into the 2nd stage “dough recipe”, no longer fearing to work with such a wet dough! LOL!
I understand these “long ferment” breads tend to not only taste better and are more tender yet chewy, but also develop many additional subtle flavors from the wheat flours, and also gives them a longer shelf life, and better mold resistance, of course the “crumb” is exceptional for using a few slices with soups, or even plain as a side with a Caesar salad.
but I can tell you from cooking in a local “Artisan themed” restaurant recently, that aside from the usual vertically cut slices, cutting a portion of 1/4 loaf (1/3 if it comes out really light) of that slipper horizontally, and spreading the bottom with a black and green olive tapenade, and layering things like Prosciutto Di Parma, asparagus and thinly sliced fresh eggplant both brushed with evoo & grilled with a grind of sea salt, and further stacked with 2 or 3 modest slivers (lobes) of prepared roasted red peppers, plus some thin slices from across the wide eye of a fresh Mozzarella ball that also has a sprinkling of grated asiago on top of them, along with a few fresh basil leaves and then drizzled with a sweet, rich, and gooey, Balsamic reduction (and I mean evaporating around 85% before turning up the heat to begin to “candy caramelize” it but stopping before crackle and only boiling the last few moments, just enough for it to bubble to the top of the pot to bring up the shine and result in smooth “sticks to everything” at room temperature “ribbons” of sweet ZESTY goodness that will stay in place, and drip only slightly or ever so slowly that molasses would win the race & never “runny” unless over heated), and evoo, with the top part of the slipper being swiped with a roasted garlic spread (made from JUST garlic, slow & low roasted in evoo until soft and golden almost throughout, without the heat ever reaching the smoke point…pure heaven for roasted garlic lovers), before closing the top on it, and then the whole thing being “panini grilled”…OMG the salivation is violating the laws of physics…I swallowed so much while writing this, that now I’m full! LOL!
So you see, since it has been a few (wow five now) years since working (disability), why I would need this kind of loaf to satiate my cravings, and since it’s only me, being able to keep it a few extra days will be a huge plus instead of risking crushing that “holey crumb” by vacuum sealing and freezing it… that is only for emergency reserves, and not everyday eating! LOL!
Thanks for sharing your recipe and….Bon Appetite!
TSG!
Cathy W. says
Thanks TSG! Now you’re making me hungry for some more ciabatti.
Stephen Herman says
With the size of my wet loaf prior to first fermentation on counter top, I find 8×8 really turns out to be too thick, it’s more like 15×15 to get it as thin as you show in your photo! If it is thicker what are my problems, if any, as I make only 2 loaves?
Cathy says
Hi Stephen, the 8 inch square is an approximation at this point. You still need to stretch and fold the dough to strengthen the gluten. After the stretch and fold is when you’ll make more of a square or rectangle. You’ll need to make longer loaves if you are only doing 2 loaves. Ciabatti is not as exact as other loaves so you can play around a bit just don’t degas it too much. Hope this helps.