
This Rosemary Spelt Semolina Pain Au Levain was my bread-baking project for the past several weeks.
My first goal with this bread was to test my new oblong banneton basket. I needed a bread that used a lot of dough to be able to fill this 13.5-inch basket. The Pain au Levain dough was close to 3 pounds of dough so it fit the bill.
13.5-inch Oblong Banneton Proofing Basket
My second goal for this loaf was to bring an edible bread to a luncheon. I met both goals the first weekend I made this bread; however, the process I used was less than optimal. Basically, I fought with the dough. This is never a good idea because the dough always wins.
I tried to rush the process so the bread would be ready the day before the luncheon and I wouldn’t have to rush around the next morning. However, the dough just wouldn’t listen. No matter how much I fussed at it, it wouldn’t hurry. I ended up retarding it in the refrigerator several times trying to get it to do what I wanted it to do.
[includeme file=”includes/responsive-sourdough-top”]
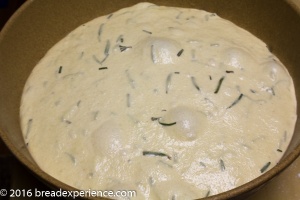
It is a high hydration dough and although I knew that I should use a liner with the basket, I wanted the rings, doggoned so I dusted it heavily with flour and placed the dough in it.
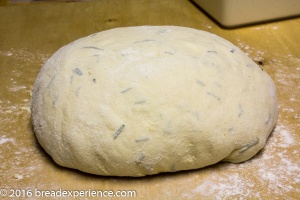
Guess how well that worked out? It didn’t! The dough stuck to the basket and deflated. At this point, I threw up my hands and said, “fine, have it your way!” and I gave up trying to fight with it. I didn’t know whether I could salvage the dough but I decided to go with it. I added a little flour because it was so sticky, formed it back into a ball and placed it the bowl. I covered the bowl with plastic and placed it back in the refrigerator for several hours.
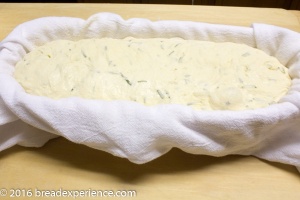
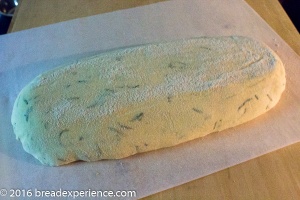
Later that night, I shaped it (cold) into a batard and placed it in a lined basket. I had learned my lesson on that one. This was the compromise between me and the dough. I used the lined basket and it didn’t stick. It did what it was supposed to do after that. Or, I guess I should say that I did what I was supposed to do and things worked much better.
The next day, I baked the loaf and it was fabulous! I did have to rush a little, but it was worth it. And, I took back all of the whining and complaining that I had done the day before. The luncheon participants enjoyed it so I knew I had a winner!
However, there was a problem. The process! What the heck did I do to get it to turn out so well! After all of the in and out of the refrigerator and in and out of the proofing basket and shaping and reshaping, I was surprised it rose at all. What a messy method!
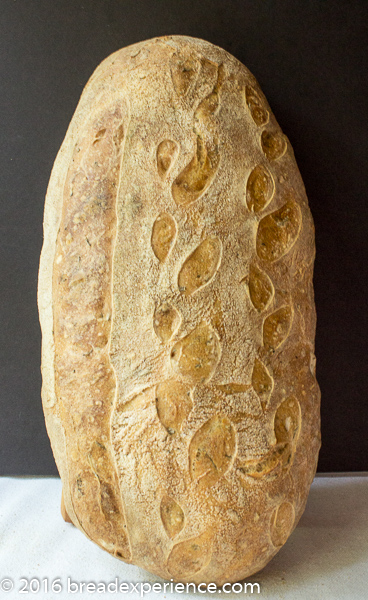
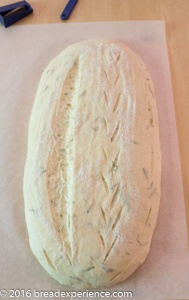
I was very proud that this bread actually turned out as good as it did, but I knew I needed to make a few adjustments in order to simplify the process. So I made it a few more times to perfect the process and timing. I used slightly different scoring each time so I could keep up with the different loaves (in my camera).
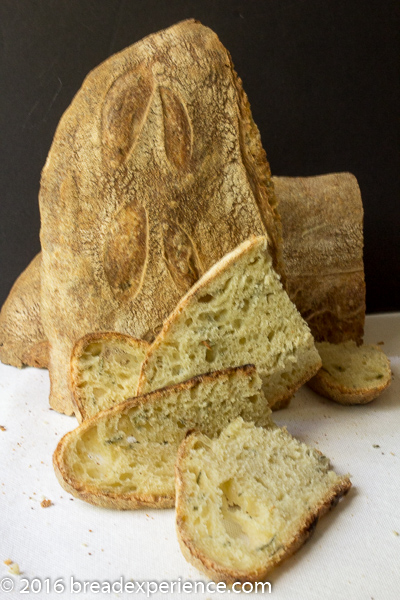
The first loaf – May 14
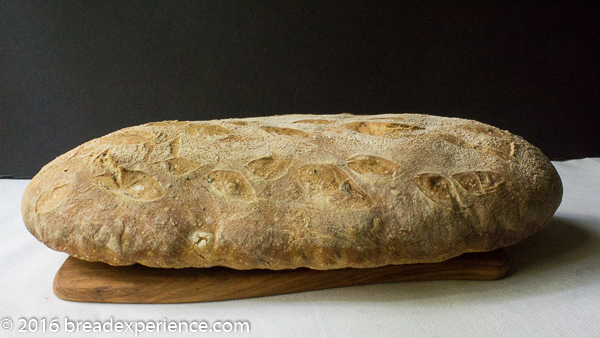
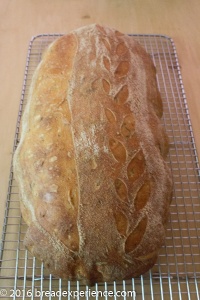
The second time I made it, the oven spring was tremendous!
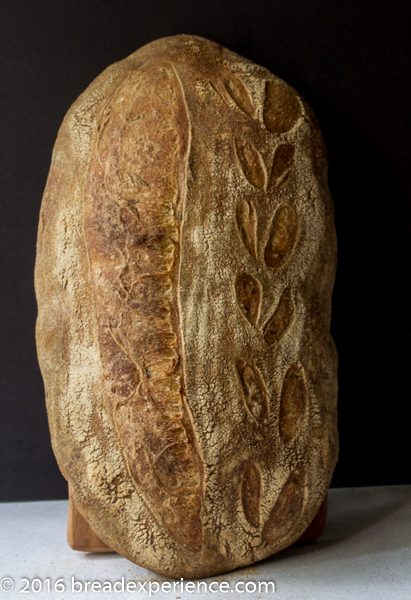
2nd Loaf – May 20th
It reminded me of a blimp.
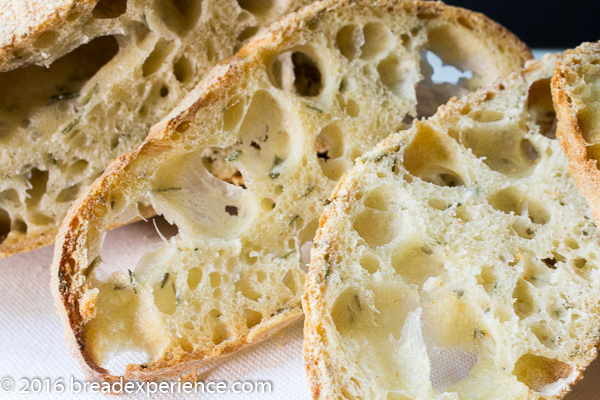
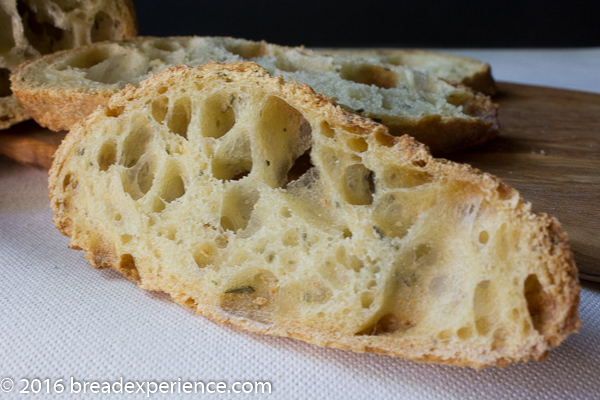
Some of the holes were big enough for the driver of the blimp to fit in. Although they looked beautiful, it’s hard to enjoy this bread spread with egg salad because it just falls through the holes. The reason the holes were so big is because I didn’t degas it enough before I shaped it into a batard.
I didn’t want holes quite that big so I decided to make it a third time. This time I degassed it a little better and shaped it a bit tighter. They say the third time is a charm. I was very pleased with this one, but I like the scoring on the first one better.
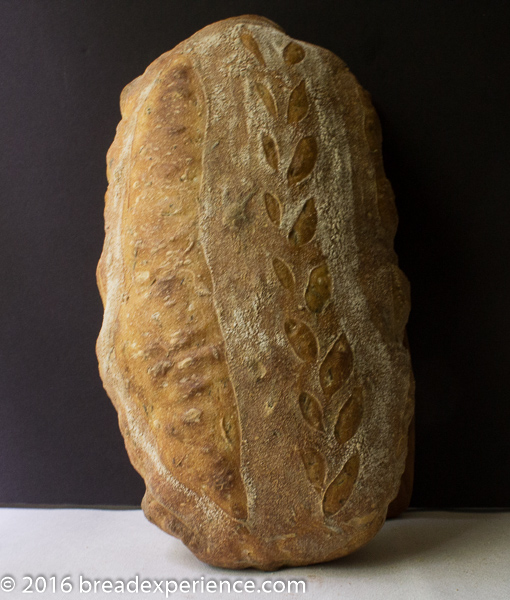
3rd Loaf – May 27th
I still got big beautiful holes. Perhaps I could degas it a bit more, but the texture and flavor of this loaf is fabulous so I decided to leave well enough alone. I’m sticking with this process.
Since this bread was so huge and I made it several times, I froze some of it and found creative ways to enjoy the rest of it. I served it as brushetta one night to accompany baked salmon and vegetables over pasta.

It made a great appetizer while we waited for dinner to be served.

[includeme file=”includes/responsive-sourdough-bottom”]
The moral of this story is don’t argue with the dough! It will always win! But that’s not a bad thing. Just listen to it and pay attention to what it needs.
Print
Rosemary Spelt Semolina Pain au Levain
- Yield: 1 Large Loaf 1x
Description
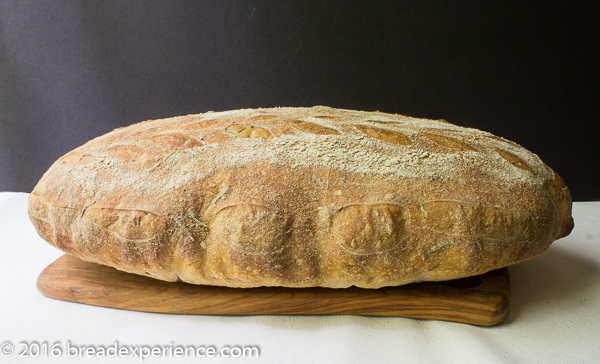
This Rosemary Spelt Semolina Pain Au Levain weighs almost three pounds and is baked on a baking steel to produce tremendous oven spring.
Ingredients
Levain
- 227 grams all-purpose Spelt flour
- 227 grams water
- 45 grams sourdough starter
Final Dough
- 385 grams all-purpose Spelt flour
- 300 grams Semolina flour
- 350 grams water + 25 grams (to mix with salt)
- 14 grams fine sea salt
- 20 grams chopped fresh rosemary, or to taste
Instructions
Levain:
- Mix the water and starter together in a large bowl. Add in the flour and mix until completely hydrated. Cover with plastic wrap and let rest at room temperature for 8 – 10 hours.
Final Dough:
- Pour the water over the levain and mix thoroughly with a wooden spoon or whisk to disperse.
- Mix the flours with the rosemary and add it on top of the water/levain mixture. Hold the salt until after the autolyse.
- Mix thoroughly using a Danish dough whisk or wooden spoon. Cover and let it rest (autolyse) for 20 – 30 minutes.
- Sprinkle the salt over the top and dissolve it with the 25 grams of water. Use your fingers to pinch the dough to incorporate the salt evenly throughout.
- Cover and let it bulk ferment for a total of 2 – 3 hours. Fold the dough every 45 minutes, for a total of 3 times, during the bulk ferment.
- After the 3rd fold, place the dough back in the bowl and let it rest for 30 minutes. Make sure it is covered tightly and place it in the refrigerator overnight, or 8 – 10 hours.
- The next day, remove the cold dough from the refrigerator and shape it into a tight batard, if making one large loaf, or two medium round loaves. Be sure to carefully degas the big air pockets, unless you want them, of course.
- Place the shaped loaf in a lined proofing basket. I don’t have a liner to fit this particular banneton basket so I used a thin towel and it worked really well. Some of the rings actually came through.
- Cover and place the basket in the refrigerator for 6 – 8 hours.
- Place a baking stone or steel on the bottom shelf of the oven and preheat to 450 degrees F. for at least 45 minutes. If you plan to use steam, place a steam pan on the top shelf.
- When the oven is sufficiently preheated, remove the loaf from the refrigerator. Carefully invert the loaves from the banneton proofing baskets onto parchment paper or a heavily dusted peel. I’ve found that using a lined basket aids with this process. You just carefully peel off the liner after flipping it over onto the parchment.
- Score the loaves in the pattern of your choice.
- Slide them onto the preheated baking stone or steel and bake for 35 – 45 minutes. A larger loaf will take longer. When making one large loaf, I found it was easier to slide it in the oven using the back of a baking sheet. It was so heavy I was concerned I would drop it using the peel. I used a baking steel to bake all three of these loaves and the oven spring was tremendous on each one.
Notes
Adapted from Richard Miscovich’s Pain au Levain.
- Category: Pain au Levain
- Cuisine: Naturally Leavened Bread
Happy Baking!
Cathy
Leave a Reply