
This post is about making Sprouted Wheat Poolish Baguettes and baking them in an Emile Henry Ceramic Baguette Baker.
Becoming proficient at making baguettes is a goal a lot of bread bakers strive for at some point in their bread-baking journey. Although I’ve made baguettes numerous times, I still find the whole shaping process a bit elusive.
So when Emile Henry contacted me several weeks ago to offer the opportunity to test one of their ceramic baguette bakers, I gladly accepted. It was time to practice again.
They sent me the baguette baker, I opened the box and placed the unit on my Dining room table, and there it sat for a while just looking pretty. I would eye it from time to time and think “I need to make some baguettes so I can use this beautiful baker,” but my schedule was so crazy that other things kept getting in the way.
I finally had the time and motivation last weekend so I made some poolish baguettes. I’ve tried three batches so far.
My procrastination in attempting baguettes this time was partly because I had surgery on my right index finger last year and I’m still learning how to use it efficiently. With that context in mind, perhaps you can understand why making these poolish baguettes was an extra special feat.
I still need practice achieving the pointy end on the loaves, but what I found is that I don’t necessarily need to be able to bend my finger completely to shape these loaves. That’s a good thing because right now I only have about 85% mobility in my finger, but thankfully, it’s enough for typing and bread baking: the two things I do the most.
About this baguette formula
I created the formula for these loaves. I started with an overnight poolish which makes up one-third of the total dough. I scaled the formula so that the proofed dough fits inside the baguette baker (if you don’t let the loaves proof too long). I also included some sprouted wheat flour for good measure.
The formula is very versatile. I’ve been playing around with it and including varying amounts of sprouted wheat. I made the first batch with all-purpose flour and about 7% white whole wheat flour that I sprouted, dried, and milled into flour. The second batch included 15% sprouted whole wheat flour. The third batch was made with 75% all-purpose flour and 25% sprouted wheat flour.
The first two batches were mixed in a stand mixer, but I prepared the third batch completely by hand. My taste tester (aka son) and I like the flavor, texture, and chewiness of the crumb on the third one the best so this is the formula/method presented in this post.

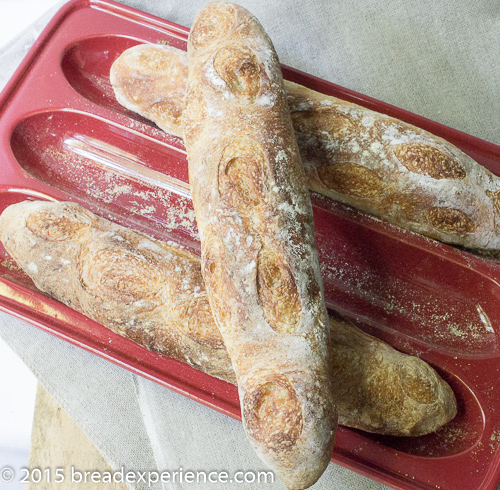
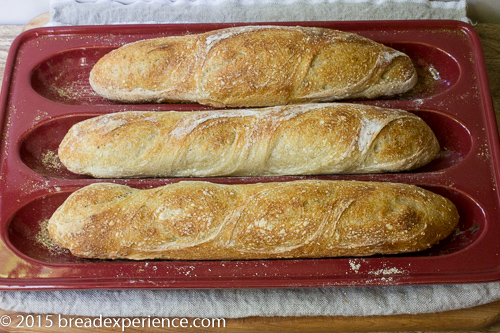
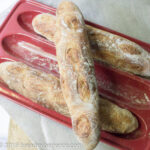
I’m beginning to understand why so many bakers love these long loaves. Making baguettes can be fun especially when you bake them in the lovely Emile Henry Baguette Baker. Not only is the ceramic baker beautiful, but due to its unique design, it produces loaves that are crispy on the outside with a bit of chewiness and soft on the inside. Simply delightful!
Need a little help shaping Baguettes?
Watch this video from the San Francisco Baking Institute. The instructor breaks the shaping process down step by step.
Sprouted Wheat Poolish Baguettes
- Yield: 3 Loaves 1x
Description
Sprouted Wheat Poolish Baguettes baked in an Emile Henry Ceramic Baguette Baker. The formula is very versatile. I’ve been playing around with it and including varying amounts of sprouted wheat.
Ingredients
Poolish
- All-purpose flour 165 grams (50%)
- Water 165 grams (50%)
- Pinch (1/8 tsp) instant yeast
Final Dough:
- All-purpose flour 251 grams (75% final dough/83% total dough))
- Sprouted wheat flour 84 grams (25% final dough/17% of total dough)
- Water 195 grams (58% in final dough/72% total hydration)
- Poolish 330 grams
- Yeast 2.0 grams
- Salt 8-10 grams
Instructions
Making the Poolish:
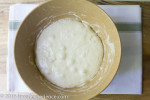
- In a large mixing bowl, whisk together the flour and yeast. Sir in the water using a wooden spoon or Danish dough whisk until the mixture is completely blended. Scrap the bowl down using a dough scraper or spatula. Cover with plastic wrap and let the poolish rest overnight at room temperature (70 – 75 degrees F.) for 8 to 12 hours.
Making the Final Dough:
- The next morning, when the poolish is ripe, remove the plastic wrap and pour the water around the edges of the bowl to loosen it. Stir the mixture to completely break up the poolish.
- In a separate bowl, whisk together the flours and yeast. Hold the salt. It will be added after the autolyse (step 4).
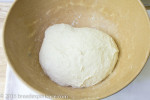
- Add the flour mixture to the poolish mixture and mix thoroughly using a Danish dough whisk or wooden spoon. Continue mixing until the dough is too thick to mix with the whisk or spoon; then switch to using your hands. Wet your hands then mix the dough using the fold-and-turn method in the bowl.
- When the dough is thoroughly incorporated, scrap the bowl down using a dough scraper or spatula. Then cover with plastic wrap and let the dough rest (autolyse) for 15 – 20 minutes.
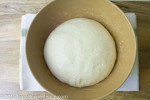
- Remove the plastic wrap and sprinkle the salt over the top of the dough. Thoroughly mix the salt into the dough using your fingers. Add a little bit of water if necessary.
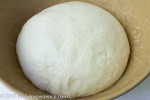
- Scrap the bowl down again, recover with plastic wrap (or a kitchen towel), and let the dough bulk ferment in the bowl for 2 – 2 1/2 hours. During the bulk fermentation, do a series of stretch and folds on the dough every 30 minutes for the first 1 1/2 hours for a total of 3 folds.
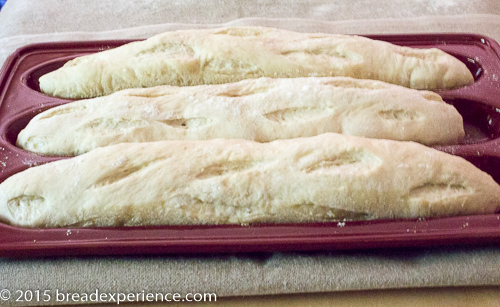
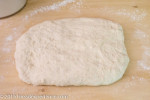
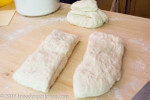
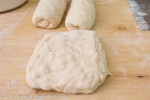
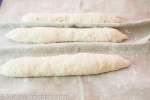
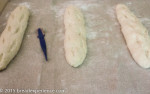
- Lightly flour a work surface. Uncover the dough, and transfer it to the work surface. Pat it out into a rectangle and degas the dough slightly. Divide it into three equal rectangles by weight (273 grams). Preshape the rectangles into logs (refer to the video to learn the technique). Place the logs seam side down on a floured board or work surface. Cover with a kitchen towel or couche and let them bench rest for 30 minutes.
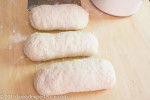
- Uncover the dough and transfer the preshaped loaves to a clean work surface. Gently press on each piece to lightly degas it and shape into a baguette shape. Place each baguette seam-side up on a floured couche. Bring the folds of the couche up between the loaves. Cover the loaves with a towel and let them proof for 45 minutes.
- While the loaves are in the final rise, preheat the oven to 475 degrees F. and place the baguette baker on the bottom shelf. Allow the oven and the baguette baker to preheat for at least 45 minutes.
- Carefully remove the preheated baker from the oven using heavy oven mitts. Place the lid on a heavy towel or pot holder to keep it from cracking from the temperature change. Put the bottom of the baker on another towel or pot holder. Sprinkle the bottom of the baker with cornmeal.
- Transfer the loaves from the couche to the baker using a wooden board or a bench knife. Score the loaves with 4 long slashes. You can score them before you transfer them to the baker if you prefer. The loaves expand when you slash them, so you might find it easier to transfer them first. Just be careful not to burn yourself on the hot baker.
- Using heavy oven mitts, place the bottom of the baker in the oven and set the lid on top. Let the loaf bake for 15 -20 minutes with the lid on; then remove the lid and let it bake for another 10 minutes or until it is a deep brown and sounds hollow when thumped on the bottom.
- Remove the baker from the oven and transfer the loaves to a wire rack to cool completely before slicing.
Notes
After removing the lid from the baguette baker, be sure to place it on a heavy towel or pot holder to prevent it from cracking due to extreme temperature change.
- Category: Baguettes
- Method: Poolish
- Cuisine: French
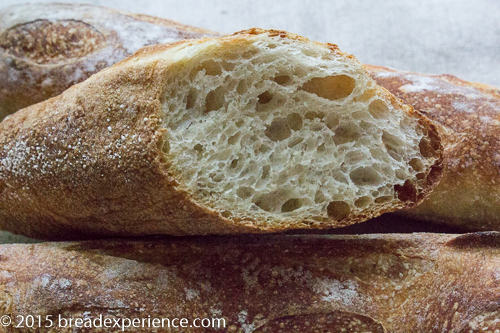
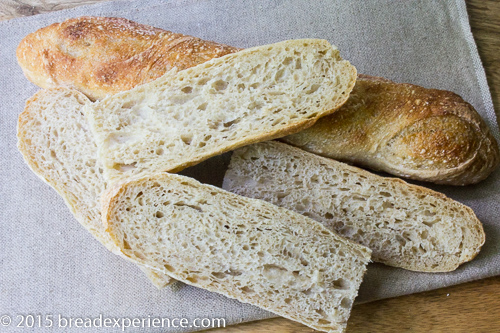
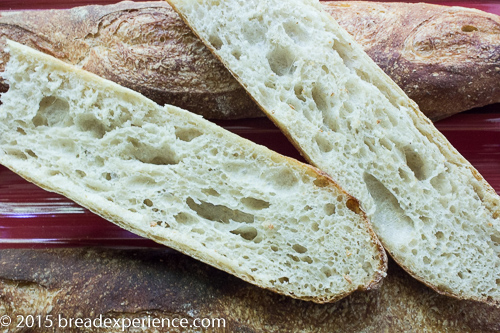
Here are the crumb shots from the three batches of baguettes.
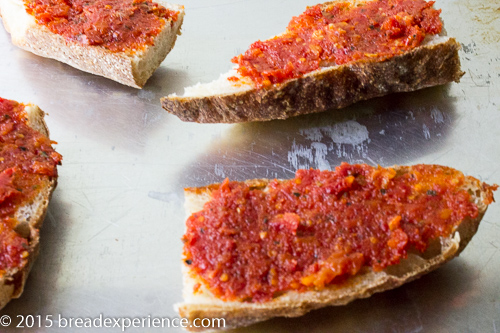
My son and I enjoyed slices of these loaves warm with butter and some were used in sandwiches. We made bruschetta with two of the loaves and had them for dinner a couple of nights. We toasted the slices and spread them with sundried tomato pesto. Yum!
I originally became a fan of poolish baguettes because of the flavor and chewy texture. Now I like them because they are easy to make.
Happy Baking!
Cathy
Disclaimer: I received an Emile Henry Ceramic Baguette Baker for this review. I appreciate the opportunity to test this baker. I enjoyed using it and look forward to baking more baguettes in it. Thank you Emile Henry!
Leave a Reply